In this topic, we will create a Spring Boot Project in the Eclipse IDE. We will learn to create Spring Boot Project, Configure and Run it step-by-step in Eclipse IDE.
Table of content:
1. How to create a Spring Boot Project in Eclipse IDE?
2. Project Structure of Spring Boot Project
3. How to run a Spring Boot Project in Eclipse IDE?
4. Conclusion
1. How to create Spring Boot Project in Eclipse IDE?
We are creating a Spring Boot project in the Eclipse IDE we need to integrate the STS plugin in Eclipse. These are the following steps for integrating STS plugin and creating Spring Boot Project in Eclipse:
1. Open Eclipse IDE
2. Goto Help Tab
3. Click on Eclipse Marketplace
4. Search STS
5. Install STS
6. After installing STS click on the icon of the Spring Dashboard
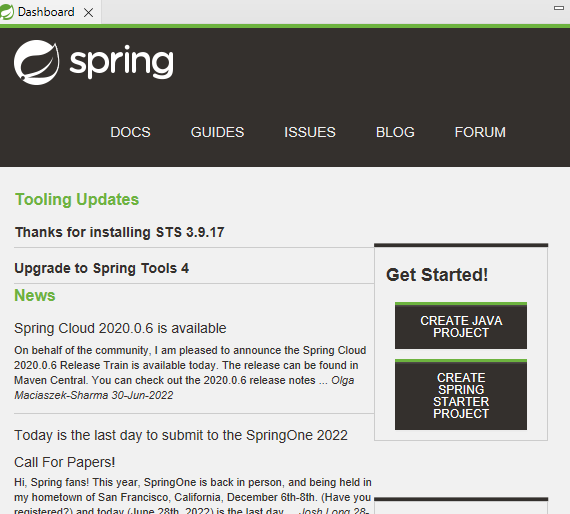
7. Click on Create Spring Starter Project
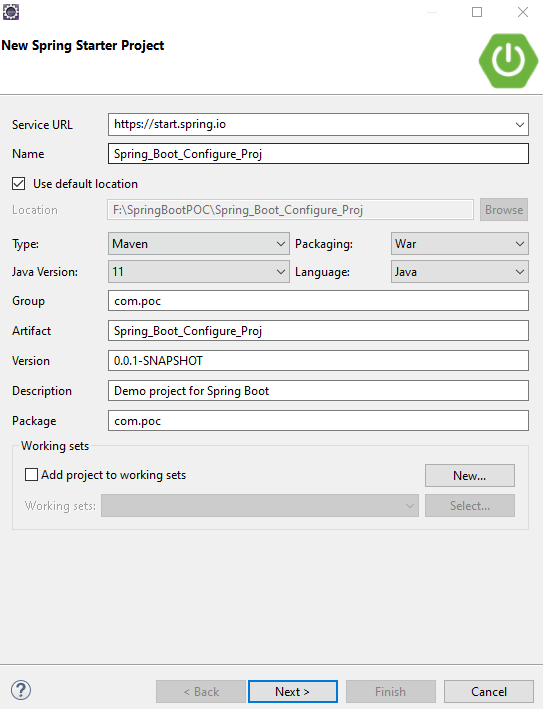
8. Enter Project Name etc. and then click the Next Button
9. Select the Spring Boot Version and Select Dependency Library for our project.
10. Click on the Finish button then the project is successfully created.

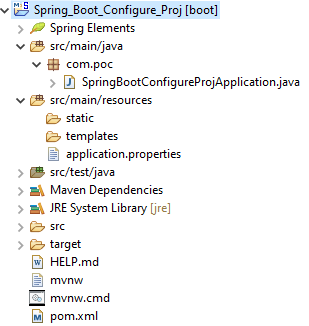
2. Project Structure of Spring Boot Project
This image is shown the Project Structure of the Spring Boot Project:
Maven Dependency
pom.xml:
<?xml version="1.0" encoding="UTF-8"?>
<project
xmlns="http://maven.apache.org/POM/4.0.0" xmlns:xsi="http://www.w3.org/2001/XMLSchema-instance"
	xsi:schemaLocation="http://maven.apache.org/POM/4.0.0 https://maven.apache.org/xsd/maven-4.0.0.xsd">
	<modelVersion>4.0.0</modelVersion>
	<parent>
		<groupId>org.springframework.boot</groupId>
		<artifactId>spring-boot-starter-parent</artifactId>
		<version>2.7.6</version>
		<relativePath/> <!-- lookup parent from repository -->
	</parent>
	<groupId>com.poc</groupId>
	<artifactId>Spring_Boot_Configure_Proj</artifactId>
	<version>0.0.1-SNAPSHOT</version>
	<name>Spring_Boot_Configure_Proj</name>
	<description>Demo project for Spring Boot</description>
	<properties>
		<java.version>1.8</java.version>
	</properties>
	<dependencies>
		<dependency>
			<groupId>org.springframework.boot</groupId>
			<artifactId>spring-boot-starter-web</artifactId>
		</dependency>

		<dependency>
			<groupId>org.springframework.boot</groupId>
			<artifactId>spring-boot-starter-test</artifactId>
			<scope>test</scope>
		</dependency>
	</dependencies>

	<build>
		<plugins>
			<plugin>
				<groupId>org.springframework.boot</groupId>
				<artifactId>spring-boot-maven-plugin</artifactId>
			</plugin>
		</plugins>
	</build>

</project>
SpringBootApplication class:
package com.poc;

import java.util.Arrays;

import org.springframework.boot.CommandLineRunner;
import org.springframework.boot.SpringApplication;
import org.springframework.boot.autoconfigure.SpringBootApplication;
import org.springframework.context.ApplicationContext;
import org.springframework.context.annotation.Bean;

@SpringBootApplication
public class SpringBootConfigureProjApplication {

	public static void main(String[] args) {

		SpringApplication.run(SpringBootConfigureProjApplication.class, args);
	}

	@Bean
	public CommandLineRunner commandLineRunner(ApplicationContext ctx) {
		return args -> {

			 System.out.println("Default Beans are configured:");

			String[] beanNames = ctx.getBeanDefinitionNames();
			Arrays.sort(beanNames);
			for (String beanName : beanNames) {
				System.out.println(beanName);
			}

		};
	}

}
→ @SpringBootApplication annotation enables features of these three annotations are:
• @Configuration
• @EnableAutoConfiguration
• @ComponentScan
→ @Bean is a very important annotation in Spring Framework. This annotation is used in the method to return a bean to the Spring Context. This annotation can be used in the Configuration classes of the application.
→ ApplicationContext represents the Spring IoC container and is responsible for instantiating, configuring and managing beans.
→ CommandLineRunner is a Functional Interface that has a run(-) method.
→ “ctx.getBeanDefinitionNames()” returns all beans by default provided by Spring Boot in this application.
3. How to run a Spring Boot Project in Eclipse IDE?
Right-click on this SpringBootAppliction class(automatically generated ) of this project then click on Run As and then click on Java Application. Now our project is running successfully. See the output console embedded tomcat server port to by default 8080 is started.
4. Conclusion
In this topic, we learned about How to integrate STS in Eclipse IDE, Create a Spring Boot Project in Eclipse IDE and Run a Spring Boot Project in Eclipse IDE.