Last updated on March 9th, 2024
In this topic, we will create a Spring Boot Project in VS Code IDE. We will learn to create a Spring Boot Project and Run it step-by-step in Visual Studio Code IDE.
Table of content
1. How to create a Spring Boot Project in Visual Studio Code IDE?
2. Project Structure of Spring Boot Project
3. How to run a Spring Boot Project in Visual Studio Code IDE?
4. Conclusion
1. How to create a Spring Boot Project in VS Code IDE?
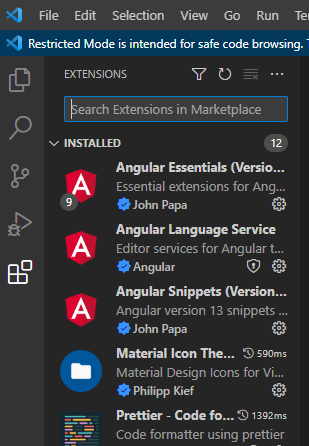
Creating a Spring Boot Project in Visual Studio Code IDE we need to install some extensions. There are several steps to follow to install extensions in the IDE:
1. Click on the extension
2. Search Extension Pack for Java
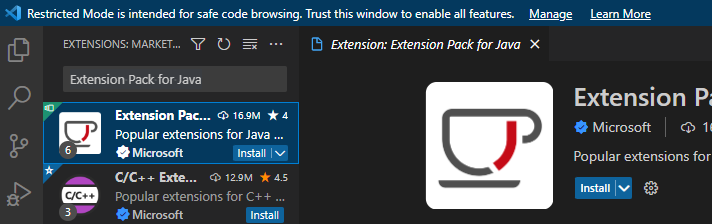
3. Click on the Install button
4. After successfully installing the Extension Pack for Java
5. Search for another extension Spring Boot Extension
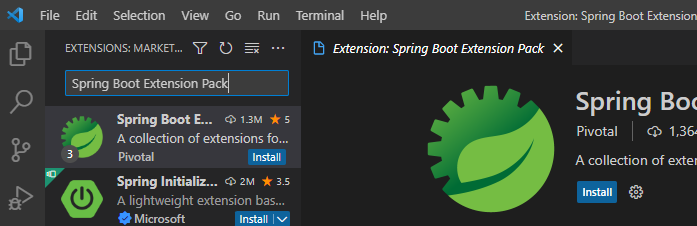
6. Click on the Install button
7. After successfully installing Spring Boot Extension
8. After installing these extensions we are ready to create our Spring Project. Then we can press the shortcut ctrl+shift+p to open the Command palette or go to the view menu, and then click on the Command palette
9. Type spring then select Spring Initializr: Create a Maven Project

10. Select Spring Boot Version
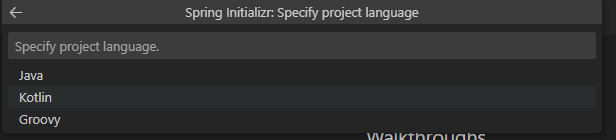
11. Select project Language

12. Type Group Id

13. Type Artifact Id

14. Select the packaging type of the project
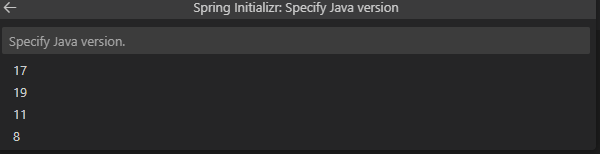
15. Select the Java Version of the project

16. Search dependencies of the project and select the required dependencies of the project and then hit enter and specify the location where can download the project and open it in the IDE
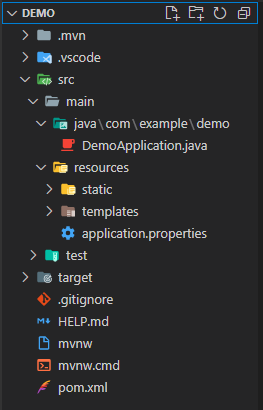
Project Structure:
Maven Dependency
pom.xml:
<?xml version="1.0" encoding="UTF-8"?>
<project xmlns="http://maven.apache.org/POM/4.0.0" xmlns:xsi="http://www.w3.org/2001/XMLSchema-instance"
	xsi:schemaLocation="http://maven.apache.org/POM/4.0.0 https://maven.apache.org/xsd/maven-4.0.0.xsd">
	<modelVersion>4.0.0</modelVersion>
	<parent>
		<groupId>org.springframework.boot</groupId>
		<artifactId>spring-boot-starter-parent</artifactId>
		<version>2.7.7</version>
		<relativePath/> <!-- lookup parent from repository -->
	</parent>
	<groupId>com.example</groupId>
	<artifactId>demo</artifactId>
	<version>0.0.1-SNAPSHOT</version>
	<name>demo</name>
	<description>Demo project for Spring Boot</description>
	<properties>
		<java.version>1.8</java.version>
	</properties>
	<dependencies>
		<dependency>
			<groupId>org.springframework.boot</groupId>
			<artifactId>spring-boot-starter-web</artifactId>
		</dependency>

		<dependency>
			<groupId>org.springframework.boot</groupId>
			<artifactId>spring-boot-starter-test</artifactId>
			<scope>test</scope>
		</dependency>
	</dependencies>

	<build>
		<plugins>
			<plugin>
				<groupId>org.springframework.boot</groupId>
				<artifactId>spring-boot-maven-plugin</artifactId>
			</plugin>
		</plugins>
	</build>
SpringBootApplication class:
package com.example.demo;

import org.springframework.boot.SpringApplication;
import org.springframework.boot.autoconfigure.SpringBootApplication;

@SpringBootApplication
public class DemoApplication {

	public static void main(String[] args) {
		SpringApplication.run(DemoApplication.class, args);
	}
}
3. How to run a Spring Boot Project in Visual Studio Code IDE?
Right-Click on the SpringBootApplication class then click on Run Java. See the console output our project is running successfully.

4. Conclusion
In this topic, we learnt about How to install an Extension Pack for Java and Spring Boot Extension? How to create Spring Boot Project and run it in the VS Code IDE?