Last updated on March 9th, 2024
In this topic, we will create and set up an example Spring Boot Project in Eclipse IDE. We will make an example Spring Boot Project through Spring Initializr and import it in Eclipse IDE.
Table of contents:
1. How to Create an Example Spring Boot Project?
2. How to set up an example Spring Boot Project in Eclipse?
3. How to run the Spring Boot Project?
4. Conclusion
1. How to Create an Example Spring Boot Project?
There are two ways to create a Spring Boot Project in the Eclipse IDE:
• Create Spring Boot Project through Spring Initializr
• Create Spring Boot Project through Eclipse+STS
Create Spring Boot Project through Spring Initializr
We are creating a Spring Boot Project through Spring Initializr. These are the following steps:
• Select a Building tool like Gradle or Maven for the project
• Select a language like Java or Kotlin or Groovy for the project
• Select a Spring Boot version for the project
• Provide project details like name, package etc.
• Add dependencies according to our requirements for the project
• Select packaging like war or jar of the project
• Select the Java version for the project
• Hit the Generate button to download the zip of the project

2. How to set up an example Spring Boot Project in Eclipse?
Unzip that downloaded project into your workspace. We have to follow some steps to set up this project in Eclipse IDE:
1. Click on the File menu
2. Click on Import
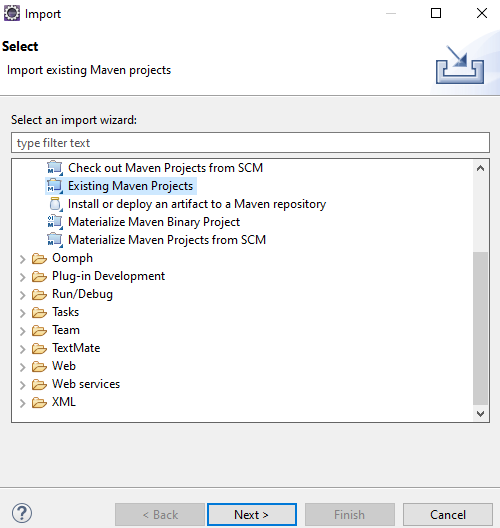
3. Select Existing Maven Projects then click on the Next button
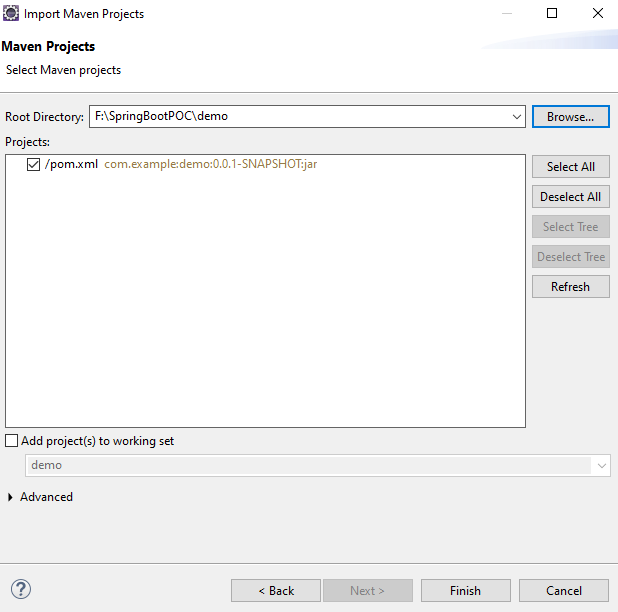
4. Browse your project and then click on the Finish button.
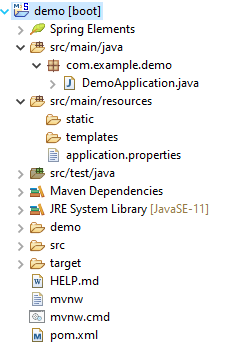
5. Now our project is successfully set up on Eclipse.
Project Structure:
Maven Dependency
pom.xml:
<?xml version="1.0" encoding="UTF-8"?>
<project xmlns="http://maven.apache.org/POM/4.0.0" xmlns:xsi="http://www.w3.org/2001/XMLSchema-instance"
	xsi:schemaLocation="http://maven.apache.org/POM/4.0.0 https://maven.apache.org/xsd/maven-4.0.0.xsd">
	<modelVersion>4.0.0</modelVersion>
	<parent>
		<groupId>org.springframework.boot</groupId>
		<artifactId>spring-boot-starter-parent</artifactId>
		<version>2.7.6</version>
		<relativePath/> <!-- lookup parent from repository -->
	</parent>
	<groupId>com.example</groupId>
	<artifactId>demo</artifactId>
	<version>0.0.1-SNAPSHOT</version>
	<name>demo</name>
	<description>Demo project for Spring Boot</description>
	<properties>
		<java.version>11</java.version>
	</properties>
	<dependencies>
		<dependency>
			<groupId>org.springframework.boot</groupId>
			<artifactId>spring-boot-starter-web</artifactId>
		</dependency>

		<dependency>
			<groupId>org.springframework.boot</groupId>
			<artifactId>spring-boot-starter-test</artifactId>
			<scope>test</scope>
		</dependency>
	</dependencies>

	<build>
		<plugins>
			<plugin>
				<groupId>org.springframework.boot</groupId>
				<artifactId>spring-boot-maven-plugin</artifactId>
			</plugin>
		</plugins>
	</build>
</project>
SpringBootApplication class:
package com.example.demo;
import org.springframework.boot.SpringApplication;
import org.springframework.boot.autoconfigure.SpringBootApplication;

@SpringBootApplication
public class DemoApplication {
  public static void main(String[] args) {
		SpringApplication.run(DemoApplication.class, args);
	}
}
3. How to run the Spring Boot Project?
Right-click on the SpringBootAppliction class then click on the Run As and then click on Java Application. Now our project is running successfully we can see the console output.
Create Spring Boot Project through Eclipse+STS
Refer to this article How to Create Spring Project in IDE to create Spring Boot Project in Eclipse IDE.
4. Conclusion
In this topic, we learnt how to create Spring Boot Project using Spring Initializr and set up Spring Boot Project in Eclipse IDE.