Last updated on November 12th, 2024
In this example, we will learn how to use Spring Security form-based authentication in the Spring Boot web application example. Spring Security provides a default login form for username and password authentication. Spring Security default username and generate the password for authentication testing. We will create step-by-step a web application in Spring Boot to use the default login form of Spring Security. In this application, we will use the default username and password and change the default username and password for the default login form.
Table of content
1. Keep Eclipse IDE ready(STS integrated)
2. Create a Spring Boot Starter Project
3. Maven Dependency
4. Create a view page
5. Create a Controller
6. How to change the default username and password in Spring Security?
7. Built-in Logout Feature of Spring Security
8. Conclusion
1. Keep Eclipse IDE ready(STS integrated)
Refer to this article How to Create Spring Project in IDE to create Spring Boot Project in Eclipse IDE.
2. Create a Spring Boot Starter Project
Add the following dependencies:
• Spring Web
• Spring Security
• Thymeleaf
3. Maven Dependency
pom.xml
<?xml version="1.0" encoding="UTF-8"?>
<project xmlns="http://maven.apache.org/POM/4.0.0" xmlns:xsi="http://www.w3.org/2001/XMLSchema-instance"
    xsi:schemaLocation="http://maven.apache.org/POM/4.0.0 https://maven.apache.org/xsd/maven-4.0.0.xsd">
    <modelVersion>4.0.0</modelVersion>
    <parent>
        <groupId>org.springframework.boot</groupId>
        <artifactId>spring-boot-starter-parent</artifactId>
        <version>2.7.11</version>
        <relativePath/> <!-- lookup parent from repository -->
    </parent>
    <groupId>com.springjava</groupId>
    <artifactId>Spring_Security_Form_Based_Authentication_Example</artifactId>
    <version>0.0.1-SNAPSHOT</version>
    <packaging>war</packaging>
    <name>Spring_Security_Form_Based_Authentication_Example</name>
    <description>Demo project for Spring Boot</description>
    <properties>
        <java.version>16</java.version>
    </properties>
    <dependencies>
        <dependency>
            <groupId>org.springframework.boot</groupId>
            <artifactId>spring-boot-starter-security</artifactId>
        </dependency>
        <dependency>
            <groupId>org.springframework.boot</groupId>
            <artifactId>spring-boot-starter-web</artifactId>
        </dependency>

        <dependency>
            <groupId>org.springframework.boot</groupId>
            <artifactId>spring-boot-starter-tomcat</artifactId>
            <scope>provided</scope>
        </dependency>
        <dependency>
            <groupId>org.springframework.boot</groupId>
            <artifactId>spring-boot-starter-test</artifactId>
            <scope>test</scope>
        </dependency>
        <dependency>
            <groupId>org.springframework.security</groupId>
            <artifactId>spring-security-test</artifactId>
            <scope>test</scope>
        </dependency>
                      <dependency>
            <groupId>org.springframework.boot</groupId>
            <artifactId>spring-boot-starter-thymeleaf</artifactId>
        </dependency>
</dependencies>
<build>
        <plugins>
            <plugin>
                <groupId>org.springframework.boot</groupId>
                <artifactId>spring-boot-maven-plugin</artifactId>
            </plugin>
        </plugins>
    </build>
</project>
4. Create a view page
Create a view page under src/main/resources/templates.
greeting.html
<html>
<body>
<h1> Welcome to Spring Security</h1>
</body>
</html>
5. Create a Controller
HomeController.java
package com.springjava.controller;
import org.springframework.stereotype.Controller;
import org.springframework.web.bind.annotation.GetMapping;

@Controller
public class GreetingController {
@GetMapping("/")
public String greeting() {
return "greeting";
    }
}
To run this application right-click on the application click on Run As then select the Run on Server option. See the console output default password generated.
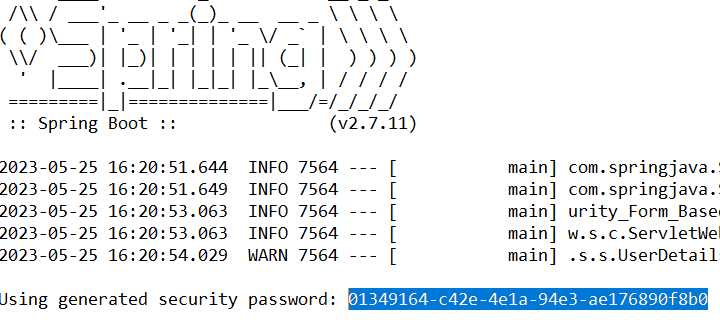
After successfully running this application on the browser default login form is shown.
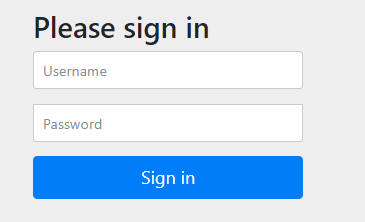
The default username is “user” and the password is generated on the console output. Then enter the username and password after then click on the Sign in button.

6. How to change the default username and password in Spring Security?
There are two ways to change the default username and password in Spring Security:
1. Change from the application.properties file
2. Create a custom username and password from the class file
1. Change from the application.properties file
We can configure a custom username and password through the application.properties file.
spring.security.user.name=admin
spring.security.user.password=admin
Now run this application again and see the console output.
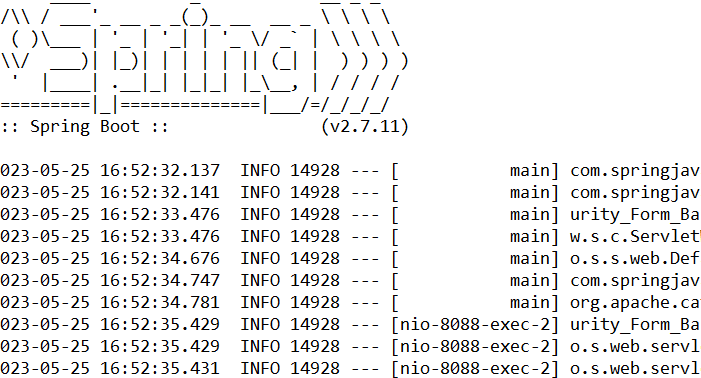
Now enter username “admin” and password “admin”.Then click on the Sign in button.
2. Create a custom username and password from the class file
We configure custom a username and password through the class file in Spring Security.
We have to create one class where we can configure a username and password for this application. We will create that class in SecurityConfig.

SecurityConfig.java
package com.springjava.security;
import org.springframework.context.annotation.Bean;
import org.springframework.context.annotation.Configuration;
import org.springframework.security.core.userdetails.User;
import org.springframework.security.core.userdetails.UserDetails;
import org.springframework.security.core.userdetails.UserDetailsService;
import org.springframework.security.crypto.bcrypt.BCryptPasswordEncoder;
import org.springframework.security.crypto.password.PasswordEncoder;
import org.springframework.security.provisioning.InMemoryUserDetailsManager;

@Configuration
public class SecurityConfig{
    @Bean
    public static PasswordEncoder passwordEncoder(){
        return new BCryptPasswordEncoder();
    }

    @Bean
    public UserDetailsService userDetailsService(){

        UserDetails admin = User.builder()
                .username("admin")
                .password(passwordEncoder().encode("admin"))
                .roles("ADMIN")
                .build();

        return new InMemoryUserDetailsManager(admin);
    }
}
Now run this application again and see the console output.

Now enter username “admin” and password “admin”.Then click on the Sign in button.
7. Built-in Logout Feature of Spring Security
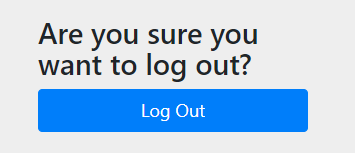
The Spring Security provide us with built-in logout functionality for this we use this URL http://localhost:8088/Spring_Security_Form_Based_Authentication_Example/logout to test the logout feature.
Now, click on the Log Out button then we will see this form page.

8. Conclusion
In this example, we learnt how to use the default login form-based authentication of Spring Security in the Spring Boot application.