Last updated on August 6th, 2024
In this topic, we will learn about Property Binding in Angular.
Table of contents:
1. What is a Property Binding in Angular?
2. Examples of Property Binding in Angular
2.1 Example 1
2.2 Example 2
2.3 Example 3
3. Alternate Syntax of Property Binding
3.1 Alternate Syntax of Property Binding Example
4. Interpolation Vs Property Binding in Angular
5. Conclusion
1. What is a Property Binding in Angular?
Property binding in Angular is a one-way-binding technique. In this technique, we can bind a property of a DOM element to the field which is a defined property in our component class.
Syntax:
<element [property]= "component_property">2. Examples of Property Binding in Angular
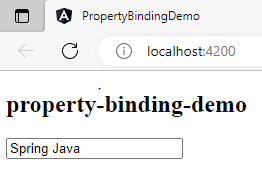
2.1 Example 1:
In this example, we can set the value to the input element by using property binding.
app.component.ts:
import { Component } from '@angular/core';

@Component({

  selector: 'app-root',

  templateUrl: './app.component.html',

  styleUrls: ['./app.component.css']

})

export class AppComponent {

  title = 'property-binding-demo';

  public name ='Spring Java';

}
app.component.html:
<h2>
{{title}}
</h2>
<input type="text" [value]="name">
Output:
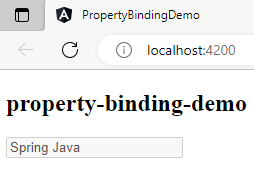
2.2 Example 2:
In this example, we can set the disable to the input element by using property binding.
app.component.ts:
import { Component } from '@angular/core';

@Component({

  selector: 'app-root',

  templateUrl: './app.component.html',

  styleUrls: ['./app.component.css']

})

export class AppComponent {

  title = 'property-binding-demo';

  public name ='Spring Java';

  public isDisabled=true;

}
app.component.html:
<h2>
{{title}}
</h2>
<input type="text" [disabled]="isDisabled" [value]="name">
Output:
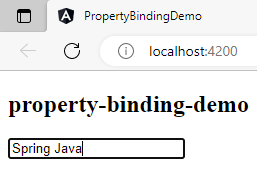
2.3 Example 3:
In this example, we can set the enable to the input element by using property binding.
app.component.ts:
import { Component } from '@angular/core';

@Component({

  selector: 'app-root',

  templateUrl: './app.component.html',

  styleUrls: ['./app.component.css']

})

export class AppComponent {

  title = 'property-binding-demo';

  public name ='Spring Java';

  public isDisabled=false;

}
app.component.html:
<h2>
{{title}}
</h2>
<input type="text" [disabled]="isDisabled" [value]="name">
Output:
3. Alternate Syntax of Property Binding:
In this, we can bind-property of the element instead of [property].
Syntax:
<element bind-property= "component_property">3.1 Alternate Syntax of Property Binding
Example:
In this example, we can set the enable to the input element by using an alternate syntax of property binding.
app.component.ts:
import { Component } from '@angular/core';

@Component({

  selector: 'app-root',

  templateUrl: './app.component.html',

  styleUrls: ['./app.component.css']

})

export class AppComponent {

  title = 'property-binding-demo';

  public name ='Spring Java';

  public isDisabled=false;

}
app.component.html:
<h2>
{{title}}
</h2>
<input type="text" bind-disabled="isDisabled" [value]="name">
Output:

4. Interpolation Vs Property Binding in Angular:
Interpolation works for String but sometimes we have to bind other than String then we must Property binding. For example, enabling/disabling an HTML element in that time Interpolation is not working because we have to bind the boolean value to the element for enabling/disabling the element.
5. Conclusion:
In this topic, we learned about property binding, syntax and use of property binding, the alternate syntax of property binding and the difference between Interpolation and property binding in Angular.