Last updated on March 9th, 2024
In the example, we can run Spring Boot with Spring MVC project on External Tomcat in eclipse.
Dependency:
<dependency>
<groupId>org.springframework.boot</groupId>
<artifactId>spring-boot-starter-tomcat</artifactId>
<scope>provided</scope>
</dependency>
You can obtain more information about the Tomcat server from this website https://tomcat.apache.org/download-90.cgi.You can extract the folder from the downloaded zip folder. You can place this extracted folder in some location on your computer or laptop.
Open Eclipse and select your workspace. After that, you go to
Window → Preferences
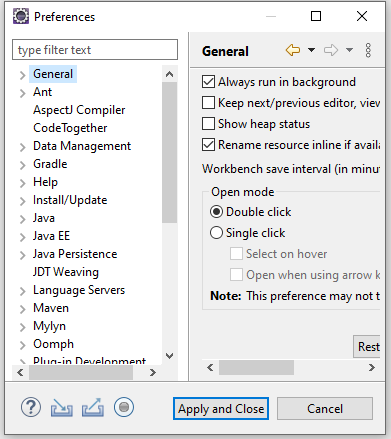
Select Server → Runtime Environment
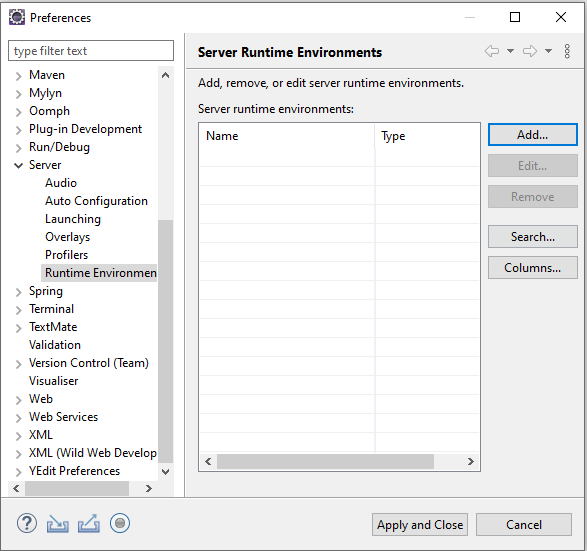
Click On Add button
Select the Tomcat server and click on the Add button
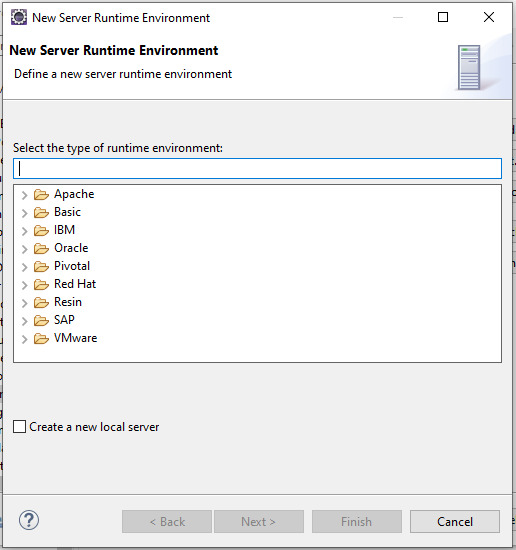
Click on Apache
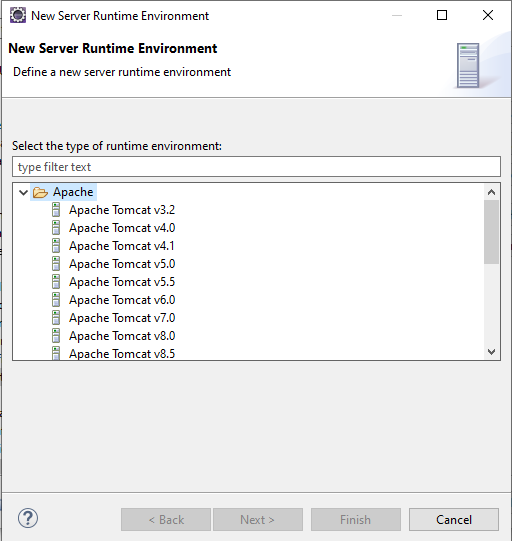
Select Tomcat Server Version
Click on the Next button
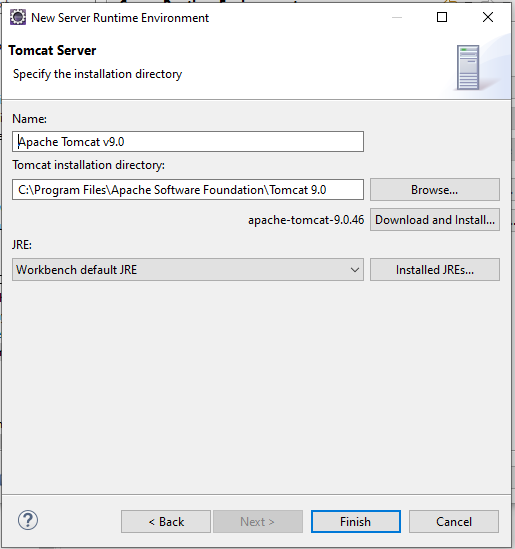
Browse the path of the Tomcat Server of the system
Click on the Finish button
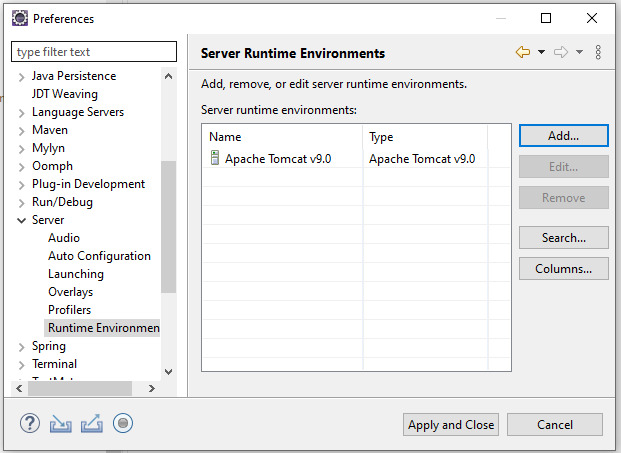
Then click on Apply and close.
After that, you configured Tomcat successfully. Now you can create the Spring Boot Project.
Development Process:
1. Keep eclipse IDE ready(STS integrated)
2. Create a Spring Boot Starter Project
3. Create a view page
4. Create a Controller class
5. Define View Resolver Path in application.properties
6. Run the Project
1. Keep eclipse IDE ready(STS Integrated)
Refer to this article How to Create Spring Project in IDE to create Spring Boot Project in Eclipse IDE.
2. Create a Spring Boot Starter Project
Select packaging war and Add the following dependencies:
• Spring Web
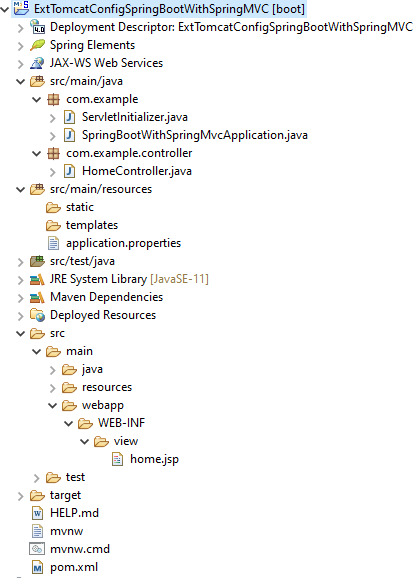
ServletInitializer class:
package com.example;
import org.springframework.boot.builder.SpringApplicationBuilder;
import org.springframework.boot.web.servlet.support.SpringBootServletInitializer;

public class ServletInitializer extends SpringBootServletInitializer {

	@Override
	protected SpringApplicationBuilder configure(SpringApplicationBuilder application) {
		return application.sources(SpringBootWithSpringMvcApplication.class);
	}
}
→ This class is automatically generated when we select packaging as the war of project creation.
→ A pontifical WebApplicationInitializer to run a SpringApplication from a traditional WAR deployment. It wraps Servlet, Filter and ServletContextInitializer beans from the application context to the server.
→ This class is needed when we are building a war file and deploying it on the external server. If you can prefer to run an embedded web server then you won’t need this at all.
SpringBootApplication class:
package com.example;
import org.springframework.boot.SpringApplication;
import org.springframework.boot.autoconfigure.SpringBootApplication;

@SpringBootApplication
public class SpringBootWithSpringMvcApplication {

	public static void main(String[] args) {
		SpringApplication.run(SpringBootWithSpringMvcApplication.class, args);
	}
}
Maven Dependency
pom.xml:
 <?xml version="1.0" encoding="UTF-8"?>
<project
xmlns="http://maven.apache.org/POM/4.0.0" xmlns:xsi="http://www.w3.org/2001/XMLSchema-instance"
	xsi:schemaLocation="http://maven.apache.org/POM/4.0.0 https://maven.apache.org/xsd/maven-4.0.0.xsd">
	<modelVersion>4.0.0</modelVersion>
	<parent>
		<groupId>org.springframework.boot</groupId>
		<artifactId>spring-boot-starter-parent</artifactId>
		<version>2.6.2</version>
		<relativePath/> <!-- lookup parent from repository -->
	</parent>
	<groupId>com.example</groupId>
	<artifactId>ExtTomcatConfigSpringBootWithSpringMVC</artifactId>
	<version>0.0.1-SNAPSHOT</version>
	<packaging>war</packaging>
	<name>ExtTomcatConfigSpringBootWithSpringMVC</name>
	<description>Demo project for Spring Boot</description>
	<properties>
		<java.version>11</java.version>
	</properties>
	<dependencies>
		<dependency>
			<groupId>org.springframework.boot</groupId>
			<artifactId>spring-boot-starter-web</artifactId>
		</dependency>

		<dependency>
			<groupId>org.springframework.boot</groupId>
			<artifactId>spring-boot-starter-tomcat</artifactId>
			<scope>provided</scope>
		</dependency>

		<dependency>
            <groupId>org.apache.tomcat.embed</groupId>
            <artifactId>tomcat-embed-jasper</artifactId>

        </dependency>

		<dependency>
			<groupId>org.springframework.boot</groupId>
			<artifactId>spring-boot-starter-test</artifactId>
			<scope>test</scope>
		</dependency>
	</dependencies>

	<build>
		<plugins>
			<plugin>
				<groupId>org.springframework.boot</groupId>
				<artifactId>spring-boot-maven-plugin</artifactId>
			</plugin>
		</plugins>
	</build>

</project>
3. Create a view page
home. jsp:
<%@ page language="java" contentType="text/html; charset=ISO-8859-1"
pageEncoding="ISO-8859-1"%>
<!DOCTYPE html>
<html>
<head>
<meta charset="ISO-8859-1">
<body>
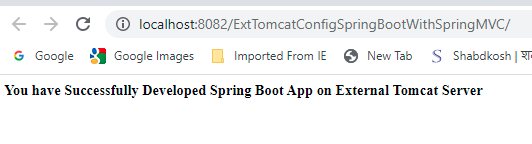
<b> You have Successfully Developed Spring Boot App on External Tomcat Server</b>
</body>
</html>→ Create under the WEB-INF/view folder.
4. Create a Controller class
HomeController.java:
package com.example.controller;
import org.springframework.stereotype.Controller;
import org.springframework.web.bind.annotation.GetMapping;

@Controller
public class HomeController {
	@GetMapping("/")
	public String msg() {
                    //return a view page name
                    return"home";
	}
}
5. Define View Resolver Path in the application.properties file
 spring.mvc.view.prefix=/WEB-INF/view/
 spring.mvc.view.suffix=.jsp
6. Run the Project
Right-click on this project then click Run as Run on Server. Then you will show a window popup and select the localhost. After that select tomcat and click on the Next button. Thus select the project which you want to run on this server. Finally, our project will be running and automatically switch to the browser and show our home page as a response output.
Output:
Conclusion:
This example is explained How to add the Tomcat Server in eclipse’s workspace and run our Spring Boot Project on an external Tomcat Server.
Thank you, I have just been searching for info approximately this subject for a long time and yours is the best I have discovered till now. However, what in regards to the conclusion? Are you certain about the source?