Last updated on March 9th, 2024
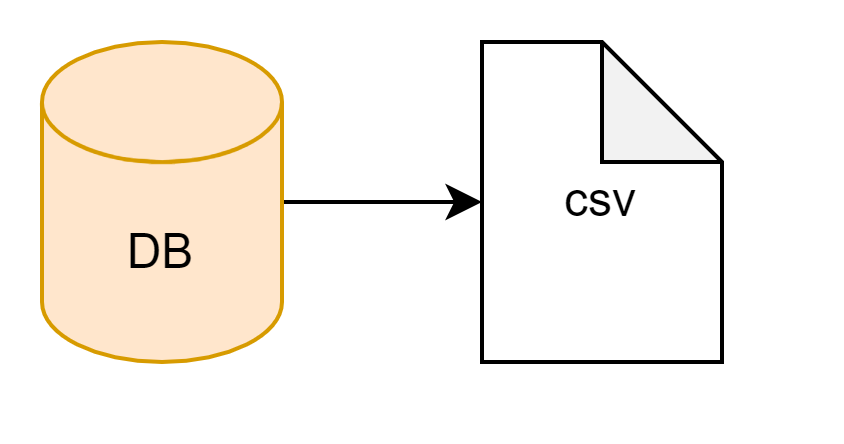
In this example, we can export data into the CSV file in Spring Boot Web Application. To achieve this task we can use the Apache Commons CSV library. We will create a Spring Boot application using Spring Web, Maven, Spring Data JPA, and H2 database.
Configuring Apache Common CSV library
Configuring this dependency in the pom.xml for export data into the CSV file in Spring Boot Application.
<dependency>
<groupId>org.apache.commons</groupId>
<artifactId>commons-csv</artifactId>
<version>1.8</version>
</dependency>
Overview of Export data into the CSV file in Spring Boot Web Application
In this example of the application, we can create one table on the database and insert some records on that table i.e., student. We will create one Java Bean class i.e., Student.java which is annotated with @Entity annotation to create a table on the database. We will create one repository interface for the persistence operation of that table i.e.,StudentRepoCSV.java. We will create a service interface i.e., StudentService.java and create one class implementation class of this service interface i.e.,StudentServiceImpl.java.We will create one utility class for generating the CSV file i.e.,CsvFileGenerator.java which contains code for creating the CSV file and writing data that will be getting from the database’s table. We will create one controller for generating a CSV file of the database table’s records i.e.,StudentController.java with a mapping URL that converts data into a CSV file. In this controller class, we will auto wiring service interface and CSV generating utility class. We will call the service’s method that will get all records of the database table. We will call the CSV file generating utility class’s method for writing the record that we will get from the service into the CSV file. We will one view page i.e., index.html.Then we will export that record into the CSV file
Table of content
1. Creating Spring Boot Project
2. Keep Eclipse IDE ready
3. Defining Database
4. Creating a JPA Entity class
5. Creating a JPA Repository
6. Creating a Service
7. Creating a CSV File Generator class
8. Creating a Controller class
9. Creating a view page
10. Inserting Records
11. Run the Spring Boot Project
1. Creating Spring Boot Project
We are creating a Spring Boot Project from this Spring Initializr.
Select the following dependencies:
• Spring Web
• Spring Data JPA
• H2 Database
2. Keep Eclipse IDE ready
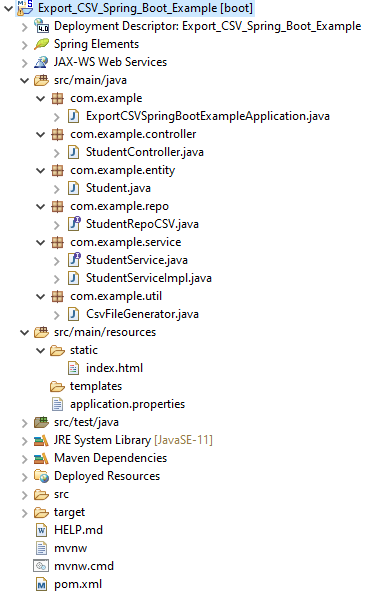
Importing the spring boot project which you created for this export data into the CSV file in Spring Boot Web Application.
Project Structure of Export CSV Spring Boot
Maven Dependency
Here is the complete pom.xml file for this export data into the CSV file in Spring Boot Web Application.
pom.xml
<?xml version="1.0" encoding="UTF-8"?>
<project
	xmlns="http://maven.apache.org/POM/4.0.0"
	xmlns:xsi="http://www.w3.org/2001/XMLSchema-instance"

xsi:schemaLocation="http://maven.apache.org/POM/4.0.0 https://maven.apache.org/xsd/maven-4.0.0.xsd">
	<modelVersion>4.0.0</modelVersion>
	<parent>
		<groupId>org.springframework.boot</groupId>
		<artifactId>spring-boot-starter-parent</artifactId>
		<version>2.6.3</version>
		<relativePath />
		<!-- lookup parent from repository -->
	</parent>
	<groupId>com.example</groupId>
	<artifactId>Export_CSV_Spring_Boot_Example</artifactId>
	<version>0.0.1-SNAPSHOT</version>
	<name>Export_CSV_Spring_Boot_Example</name>
	<description>Demo project for Spring Boot</description>
	<properties>
		<java.version>11</java.version>
	</properties>
	<dependencies>
		<dependency>
			<groupId>org.springframework.boot</groupId>
			<artifactId>spring-boot-starter-data-jpa</artifactId>
		</dependency>
		<dependency>
			<groupId>org.springframework.boot</groupId>
			<artifactId>spring-boot-starter-web</artifactId>
		</dependency>
		<dependency>
			<groupId>com.h2database</groupId>
			<artifactId>h2</artifactId>
			<scope>runtime</scope>
		</dependency>
		<dependency>
			<groupId>org.apache.commons</groupId>
			<artifactId>commons-csv</artifactId>
			<version>1.8</version>
		</dependency>
		<dependency>
			<groupId>org.springframework.boot</groupId>
			<artifactId>spring-boot-starter-test</artifactId>
			<scope>test</scope>
		</dependency>
	</dependencies>
	<build>
		<plugins>
			<plugin>
				<groupId>org.springframework.boot</groupId>
				<artifactId>spring-boot-maven-plugin</artifactId>
			</plugin>
		</plugins>
	</build>
</project>
3. Defining Database
We are configuring the H2 database configuration, embedded Tomcat Server port number and context path of this export data into the CSV file in Spring Boot in the application.properties file.
application.properties
#H2 Database
spring.datasource.url=jdbc:h2:mem:testdb
spring.datasource.driverClassName=org.h2.Driver
spring.datasource.username=admin
spring.datasource.password=
spring.jpa.database-platform=org.hibernate.dialect.H2Dialect
spring.h2.console.enabled=true
spring.jpa.show-sql=true
spring.jpa.properties.hibernate.dialect=org.hibernate.dialect.H2Dialect
spring.jpa.hibernate.ddl-auto= update
server.port=8888
server.servlet.context-path= /demo
4. Creating a JPA Entity class
We are creating a JPA entity class to create a student table in the H2 database.
Student.java
package com.example.entity;

import javax.persistence.Entity;
import javax.persistence.GeneratedValue;
import javax.persistence.GenerationType;
import javax.persistence.Id;

@Entity

public class Student {

  @Id
  @GeneratedValue(strategy = GenerationType.IDENTITY)
  private long id;
  private String studentName;
  private String email;
  private String mobileNo;

  public Student() {
  }

  public long getId() {
    return id;
  }

  public void setId(long id) {
    this.id = id;
  }

  public String getStudentName() {
    return studentName;
  }

  public void setStudentName(String studentName) {
    this.studentName = studentName;
  }

  public String getEmail() {
    return email;
  }

  public void setEmail(String email) {
    this.email = email;
  }

  public String getMobileNo() {
    return mobileNo;
  }

  public void setMobileNo(String mobileNo) {
    this.mobileNo = mobileNo;
  }
}
5. Create a JPA Repository
We are creating a JPA Repository to perform the persistence operation of the student table. The JpaRepository is available in the spring data jpa.
StudentRepository.java
package com.example.repo;

import org.springframework.data.jpa.repository.JpaRepository;
import com.example.entity.Student;
public interface StudentRepoCSV extends JpaRepository < Student, Long > {
}
6. Creating a Service
We are creating a StudentService interface for this project.
StudentService.java
package com.example.service;

import java.util.List;
import com.example.entity.Student;

public interface StudentService {
  void addStudent(Student student);
  List < Student > getStudentOfList();
}
We are creating an implementation class for the StudentService and this class is annotated with @Service annotation to make a service class.
StudentServiceImpl.java
package com.example.service;

import java.util.List;
import org.springframework.beans.factory.annotation.Autowired;
import org.springframework.stereotype.Service;
import com.example.entity.Student;
import com.example.repo.StudentRepoCSV;

@Service
public class StudentServiceImpl implements StudentService {

  @Autowired
  StudentRepoCSV studentRepo;

  @Override
  public void addStudent(Student student) {
    studentRepo.save(student);
  }

  @Override
  public List <Student> getStudentOfList() {
    return studentRepo.findAll();
  }
}
7. Creating a CSV File Generator class
We are creating a class that generates a CSV file that uses a class from the library Apache Commons CSV library that helps to export data into CSV file in the Spring Boot of this web application.
CsvFileGenerator.java
package com.example.util;

import java.io.IOException;
import java.io.Writer;
import java.util.List;
import org.apache.commons.csv.CSVFormat;
import org.apache.commons.csv.CSVPrinter;
import org.springframework.stereotype.Component;
import com.example.entity.Student;

@Component
public class CsvFileGenerator {
public void writeStudentsToCsv(List<Student> students, Writer writer) {
try {

CSVPrinter printer = new CSVPrinter(writer, CSVFormat.DEFAULT);
for (Student student : students) {
printer.printRecord(student.getId(), student.getStudentName(), student.getEmail(),
student.getMobileNo());
}
} catch (IOException e) {
e.printStackTrace();
}
}
}
8. Creating a Controller class
We are creating a controller class in which to create the request URL of this project.
StudentController.java
package com.example.controller;

import java.io.IOException;
import javax.servlet.http.HttpServletResponse;
import org.springframework.beans.factory.annotation.Autowired;
import org.springframework.stereotype.Controller;
import org.springframework.web.bind.annotation.GetMapping;
import com.example.service.StudentService;
import com.example.util.CsvFileGenerator;

@Controller
public class StudentController {

@Autowired
private StudentService studentService;

@Autowired
private CsvFileGenerator csvGenerator;

  @GetMapping("/export-to-csv")
  public void exportIntoCSV(HttpServletResponse response) throws IOException {
    response.setContentType("text/csv");
    response.addHeader("Content-Disposition", "attachment; filename=\"student.csv\"");
    csvGenerator.writeStudentsToCsv(studentService.getStudentOfList(), response.getWriter());
  }
}
9. Creating a view page
We are creating a view page under the static folder in this project.
index.html
<!DOCTYPE html>

<html>
<head>
<title>Export CSV File</title>
</head>
<body class="container">
<p>Click the button below to export the CSV file.</p>
<a href="http://localhost:8888/demo/export-to-csv" class="btn btn-primary">Download CSV File</a>
</body>
</html>
10. Inserting Records
We are inserting records on the student table with the help of CommandLineRunner. CommandLineRunner is an Interface which is having run() method. It is executed after the application startup.
package com.example;
import org.springframework.beans.factory.annotation.Autowired;
import org.springframework.boot.CommandLineRunner;
import org.springframework.boot.SpringApplication;
import org.springframework.boot.autoconfigure.SpringBootApplication;
import com.example.entity.Student;
import com.example.service.StudentService;

@SpringBootApplication
public class ExportCSVSpringBootExampleApplication implements CommandLineRunner {

  @Autowired
  private StudentService studentService;
  public static void main(String[] args) {
    SpringApplication.run(ExportCSVSpringBootExampleApplication.class, args);
  }

  @Override
  public void run(String...a) {
    for (int i = 0; i <= 10; i++) {
      Student student = new Student();
      student.setStudentName("Student Name");
      student.setEmail("student@mail.com");
      student.setMobileNo("XXXXXXXXXX");
      studentService.addStudent(student);
    }
  }
}
11. Run the Spring Project
Right-click on SpringBootApplication class(ExportCSVSpringBootExampleApplication) then click on Run As Java Application. Verify the database through the console. We can type this URL on the browser “http://localhost:8888/demo/h2-console/” to test whether the table is created on the database and data is inserted properly.


We can type this URL “http://localhost:8888/demo/” on the browser to check whether this application exports data to a CSV file properly or not.
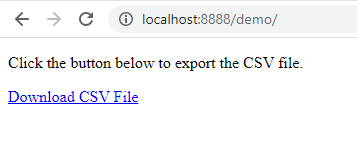
Click on the Download CSV File link for downloading the CSV file.
1,Student Name,student@mail.com,XXXXXXXXXX
2,Student Name,student@mail.com,XXXXXXXXXX
3,Student Name,student@mail.com,XXXXXXXXXX
4,Student Name,student@mail.com,XXXXXXXXXX
5,Student Name,student@mail.com,XXXXXXXXXX
6,Student Name,student@mail.com,XXXXXXXXXX
7,Student Name,student@mail.com,XXXXXXXXXX
8,Student Name,student@mail.com,XXXXXXXXXX
9,Student Name,student@mail.com,XXXXXXXXXX
10,Student Name,student@mail.com,XXXXXXXXXX
11,Student Name,student@mail.com,XXXXXXXXXX
If you want to know how to import a CSV file in Spring Boot.
Conclusion
This example is explained:
• How to transform data into a CSV file from a database?
• How to use the Apache Common CSV library?