Last updated on March 9th, 2024
In this example, we will learn to upload a file in Spring Boot JSP page. We will create a Spring Boot Web Application and run it on an external Tomcat Server. In this example, we will create a Controller class and JSP view pages.
Table of content
1. Keep Eclipse IDE ready(STS integrated)
2. Create a Spring Boot Starter Project
3. Maven Dependency
4. Defining configuration
5. Creating JSP pages
6. Creating a Controller
7. Run the app
8. Conclusion
1. Keep Eclipse IDE ready(STS Integrated)
Refer to this article How to Create Spring Project in IDE to create Spring Boot Project in Eclipse IDE.
2. Create a Spring Boot Starter Project
Add the following dependencies:
• Spring Web
Project Structure of Upload a File in Spring Boot JSP page

3. Maven Dependency
Add these dependencies in the pom.xml of the app.
<dependency>
<groupId>org.apache.tomcat.embed</groupId>
<artifactId>tomcat-embed-jasper</artifactId>
</dependency>

<dependency>
<groupId>javax.servlet</groupId>
<artifactId>jstl</artifactId>
</dependency>
pom.xml:
<?xml version="1.0" encoding="UTF-8"?>
<project xmlns="http://maven.apache.org/POM/4.0.0" xmlns:xsi="http://www.w3.org/2001/XMLSchema-instance"
	xsi:schemaLocation="http://maven.apache.org/POM/4.0.0 https://maven.apache.org/xsd/maven-4.0.0.xsd">
	<modelVersion>4.0.0</modelVersion>
	<parent>
		<groupId>org.springframework.boot</groupId>
		<artifactId>spring-boot-starter-parent</artifactId>
		<version>2.7.7</version>
		<relativePath/> <!-- lookup parent from repository -->
	</parent>
	<groupId>com.springjava.poc</groupId>
	<artifactId>Spring_Boot_File_Upload_With_JSP</artifactId>
	<version>0.0.1-SNAPSHOT</version>
	<packaging>war</packaging>
	<name>Spring_Boot_FileUpload_Example</name>
	<description>Demo project for Spring Boot</description>
	<properties>
		<java.version>16</java.version>
	</properties>
	<dependencies>
		<dependency>
			<groupId>org.springframework.boot</groupId>
			<artifactId>spring-boot-starter-web</artifactId>
		</dependency>
        <dependency>
			<groupId>org.springframework.boot</groupId>
			<artifactId>spring-boot-starter-tomcat</artifactId>
			<scope>provided</scope>
		</dependency>
		<dependency>
			<groupId>org.apache.tomcat.embed</groupId>
			<artifactId>tomcat-embed-jasper</artifactId>
		</dependency>
       <dependency>
			<groupId>javax.servlet</groupId>
			<artifactId>jstl</artifactId>
		</dependency>
		<dependency>
			<groupId>org.springframework.boot</groupId>
			<artifactId>spring-boot-starter-test</artifactId>
			<scope>test</scope>
		</dependency>
	</dependencies>
    <build>
		<plugins>
			<plugin>
				<groupId>org.springframework.boot</groupId>
				<artifactId>spring-boot-maven-plugin</artifactId>
			</plugin>
		</plugins>
	</build>
</project>
4. Defining configuration
We are defining the configuration of the Spring MVC view path in the application.properties file.
# MVC view prefix
spring.mvc.view.prefix=/WEB-INF/view/
# MVC view suffix
spring.mvc.view.suffix=.jsp
5. Creating JSP pages
index.jsp:
<%@ page language="java" contentType="text/html; charset=ISO-8859-1"
pageEncoding="ISO-8859-1"%>
<!DOCTYPE html>
<html>
<head>
<meta charset="ISO-8859-1">
<title>Spring Boot File Upload</title>
</head>
<body>
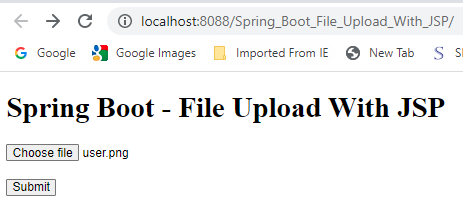
<h1>Spring Boot - File Upload With JSP</h1>
<form method="POST" action="/Spring_Boot_File_Upload_With_JSP/upload"
enctype="multipart/form-data">
<input type="file" name="file" /><br /> <br /> <input type="submit"
value="Submit" />
</form>
</body>
</html>status.jsp:
<%@ page language="java" contentType="text/html; charset=ISO-8859-1"
pageEncoding="ISO-8859-1"%>
<!DOCTYPE html>
<html>
<head>
<meta charset="ISO-8859-1">
<title>Spring Boot File Upload</title>
</head>
<body>
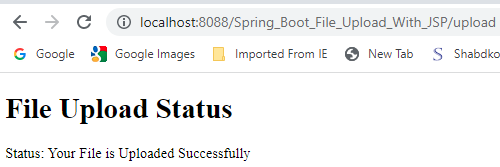
<h1>File Upload Status</h1>
Status: ${message}
</body>
</html>6. Creating a Controller
FileUploadController.java:
package com.springjava.poc.controller;
import java.io.IOException;
import java.nio.file.Files;
import java.nio.file.Path;
import java.nio.file.Paths;
import org.springframework.stereotype.Controller;
import org.springframework.web.bind.annotation.PostMapping;
import org.springframework.web.bind.annotation.RequestMapping;
import org.springframework.web.bind.annotation.RequestParam;
import org.springframework.web.multipart.MultipartFile;
import org.springframework.web.servlet.ModelAndView;

@Controller
public class FileUploadController {

	private static String UPLOAD_FOLDER = "Define  Path";

	@RequestMapping("/")
	public ModelAndView showUpload() {
		return new ModelAndView("index");
	}

	@PostMapping("/upload")
	public ModelAndView fileUpload(@RequestParam("file") MultipartFile file) {

		if (file.isEmpty()) {
			return new ModelAndView("status", "message", "Please select a file and upload again");
		}

		try {
			// read and write the file to the selected path folder
			byte[] bytes = file.getBytes();
			Path path = Paths.get(UPLOAD_FOLDER + file.getOriginalFilename());
			Files.write(path, bytes);

		} catch (IOException e) {
			e.printStackTrace();
		}

		return new ModelAndView("status", "message", "Your File is Uploaded successfully");
	}
}
7. Run the app
Refer to this article Spring Boot External Tomcat Server Configuration. Right-click on the app then click on Run As and select Run on Server.
Output:

8. Conclusion
In this example, we learnt how to upload a file in Spring Boot with JSP and run it on an external Tomcat Server.