Last updated on April 8th, 2024
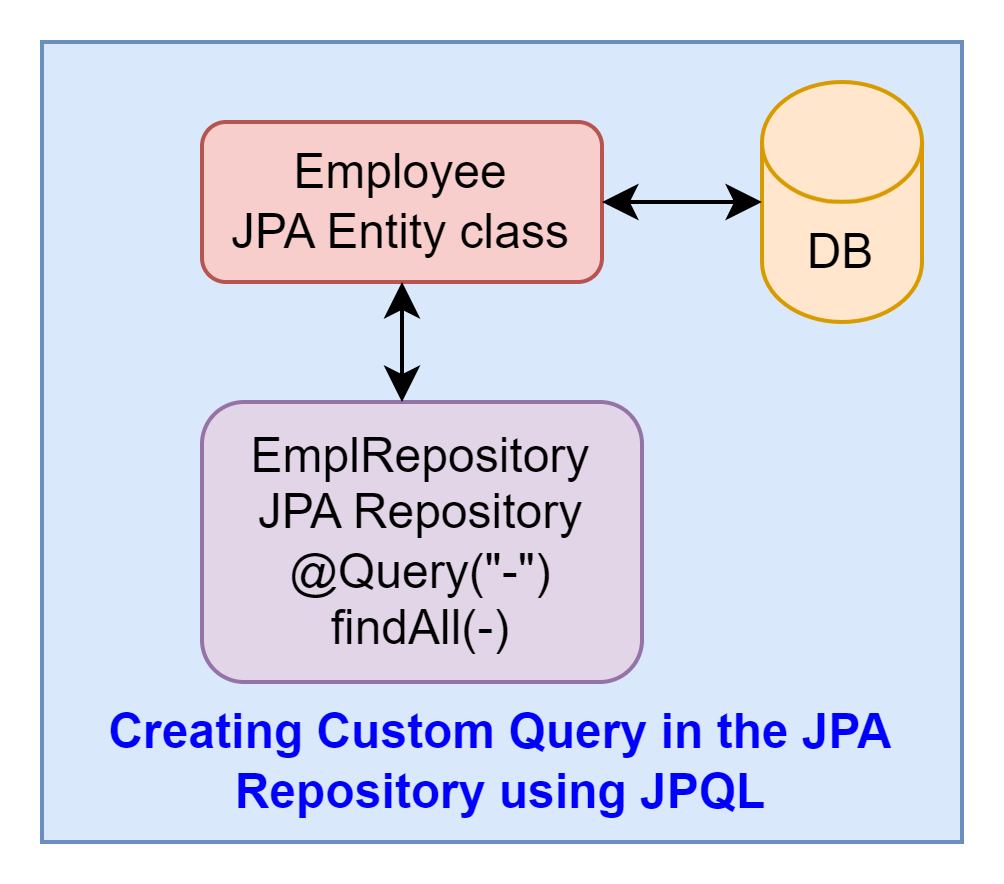
We need to create a custom method in the JPA Repository, this method needs to be annotated with @Query annotation for creating a custom query in the JPA Repository of the Spring Data JPA. In this topic, we will learn how to create queries in the JPA Repository and how to use and execute this query of the JPA Repository of the Spring Data JPA using the Spring Boot Restful web service application.
@Query Annotation
This annotation is available in the Spring Data JPA to create custom queries in the JPA Repository. It is used to define custom queries with the help of JPQL and native SQL.
JPQL
Spring Data JPA by default supports this JQPL for creating custom queries with the help @Query annotation in JPA Repository. Stands for Jakarta Persistence Query Language (formerly Java Persistence Query Language(JPQL)). This is a platform-independent object-oriented query language. It is defined as part of the Jakarta Persistence (formerly Java Persistence API(JPA)) specification.
Create Custom Query
In the below, we are defining queries with @Query annotation by providing a string using JPQL in the JPA Repository of the Spring Data JPA.
public interface EmplRepository extends JpaRepository<Employee, Long>{
@Query("SELECT em FROM Employee em")
List<Employee> findAll();
}- JPQL query is the same as native SQL query but here we can write Entity class instead of the table and em as alias name instead of star symbol (*).
Let’s create a Spring Boot application using Spring Web, Spring Data JPA, Maven, Lombok, and H2 database to implement this creating custom queries with the help of @Query using JPQL in the JPA Repository step-by-step.
1. Creating a Spring Boot Starter Project
We are creating a Spring Boot Application from the web tool Spring Initializr or you can create it from the IDE(STS, VS Code etc.) you are using.
Add the following dependencies:
- Spring Web
- Spring Data JPA
- Lombok
- H2 Database
2. Keep the IDE ready
We are importing this created application into our Eclipse IDE or you can import it into another IDE you are using. You can refer to this article to create and set up the Spring Boot Project in Eclipse IDE.
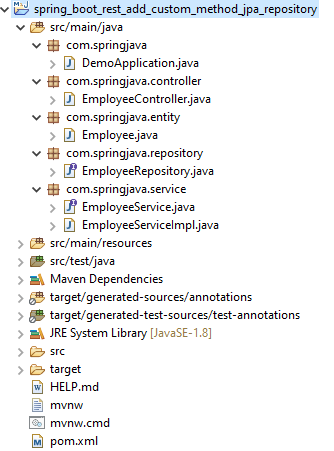
Project Structure
3. Maven Dependency
Here is the complete pom.xml file for the Spring Boot Application.
pom.xml
<?xml version="1.0" encoding="UTF-8"?>
<project
	xmlns="http://maven.apache.org/POM/4.0.0"
	xmlns:xsi="http://www.w3.org/2001/XMLSchema-instance"

xsi:schemaLocation="http://maven.apache.org/POM/4.0.0 https://maven.apache.org/xsd/maven-4.0.0.xsd">
	<modelVersion>4.0.0</modelVersion>
	<parent>
		<groupId>org.springframework.boot</groupId>
		<artifactId>spring-boot-starter-parent</artifactId>
		<version>2.6.3</version>
		<relativePath />
		<!-- lookup parent from repository -->
	</parent>
	<groupId>com.springjava</groupId>
	<artifactId>demo</artifactId>
	<version>0.0.1-SNAPSHOT</version>
	<name>demo</name>
	<description>Demo project for Spring Boot</description>
	<properties>
		<java.version>8</java.version>
	</properties>
	<dependencies>
		<dependency>
			<groupId>org.springframework.boot</groupId>
			<artifactId>spring-boot-starter-data-jpa</artifactId>
		</dependency>
		<dependency>
			<groupId>org.springframework.boot</groupId>
			<artifactId>spring-boot-starter-web</artifactId>
		</dependency>
		<dependency>
			<groupId>org.projectlombok</groupId>
			<artifactId>lombok</artifactId>
			<optional>true</optional>
		</dependency>
		<dependency>
			<groupId>com.h2database</groupId>
			<artifactId>h2</artifactId>
			<scope>runtime</scope>
		</dependency>
		<dependency>
			<groupId>org.springframework.boot</groupId>
			<artifactId>spring-boot-starter-test</artifactId>
			<scope>test</scope>
		</dependency>
	</dependencies>
	<build>
		<plugins>
			<plugin>
				<groupId>org.springframework.boot</groupId>
				<artifactId>spring-boot-maven-plugin</artifactId>
			</plugin>
		</plugins>
	</build>
</project>
4. Defining the configuration
We are configuring the H2 database configuration in the application.properties file.
application.properties
# H2 Database Configuration
spring.datasource.url=jdbc:h2:mem:test
spring.datasource.username=sa
spring.datasource.password=
spring.jpa.show-sql=true
spring.jpa.properties.hibernate.dialect=org.hibernate.dialect.H2Dialect
spring.jpa.hibernate.ddl-auto=update
spring.h2.console.enabled=true
5. Creating a JPA Entity
We are creating a JPA entity class Employee with these properties(id, name, email, and mobileNo).
Employee.java
package com.springjava.entity;

import javax.persistence.Entity;

import javax.persistence.GeneratedValue;

import javax.persistence.GenerationType;

import javax.persistence.Id;

import lombok.Data;

@Data

@Entity

public class Employee {

  @Id

  @GeneratedValue(strategy = GenerationType.IDENTITY)

  private Long id;

  private String name;

  private String email;

  private String mobileNo;

}- This @Data annotation is used for a constructor, setter method, getter method, etc.
- This @Entity annotation is used to create a table through Java code in the database.
6. Creating a JPA Repository
We are a JPA Repository to interact with the JPA Entity class and add custom queries in the repository by using @Query annotation of the Spring Data JPA. Here we can write queries using JPQL.
EmplRepository.java
package com.springjava.repository;

import java.util.List;

import org.springframework.data.jpa.repository.JpaRepository;

import org.springframework.data.jpa.repository.Query;

import com.springjava.entity.Employee;

public interface EmplRepository extends JpaRepository < Employee, Long > {

  @Query("select em from Employee em")

  List < Employee > findAll();

  @Query("select em from Employee em where em.email=?1")

  Employee findByEmail(String email);

  @Query("select em from Employee em where em.mobileNo=:mobNo")

  Employee findByMobileNo(String mobNo);

}- JPQL query is binding parameters in two ways(Positional Parameter and Named Parameter)
- The Positional Parameter is defined by the “?” followed by the number(?1). This is their position in the query that references the parameter as we have used above. Spring Data JPA will automatically replace values with each parameter in the same position order as the positional parameter of the query.
For Example:
@Query("select em from Employee em where em.email=?1")
Employee findByEmail(String email);- The Named Parameter is the parameter that starts with the symbol colon(:) followed by the name of the parameter(:mobNo) in the query.
For Example:
@Query("select em from Employee em where em.mobileNo=:mobNo")
Employee findByMobileNo(String mobNo);
7. Creating a Service Interface
We are creating a Service interface with some method declaration(save(), findAll(), findByEmail()and findByMobileNo()). So the implementation class of this interface overrides these declared methods in that class.
EmployeeService.java
package com.springjava.service;

import java.util.List;

import com.springjava.entity.Employee;

public interface EmployeeService {

  void save(Employee employee);

  List < Employee > findAll();

  Employee findByEmail(String email);

  Employee findByMobileNo(String mobNo);

}
8. Creating a Service class
We are creating a Service class EmployeeServiceImpl and this class is implementing the EmployeeService interface. This class is annotated with @Service annotation to act service for this restful web service Spring Boot Application.
EmployeeServiceImpl.java
package com.springjava.service;

import java.util.List;

import org.springframework.beans.factory.annotation.Autowired;

import org.springframework.stereotype.Service;

import com.springjava.entity.Employee;

import com.springjava.repository.EmplRepository;

@Service

public class EmployeeServiceImpl implements EmployeeService {

  @Autowired

  EmplRepository empRepo;

  @Override

  public void save(Employee employee) {

    empRepo.save(employee);

  }

  @Override

  public List < Employee > findAll() {

    return empRepo.findAll();

  }

  @Override

  public Employee findByEmail(String email) {

    return empRepo.findByEmail(email);

  }

  @Override

  public Employee findByMobileNo(String mobNo) {

    return empRepo.findByMobileNo(mobNo);

  }

}
9. Creating a Rest Controller class
We are creating a RestController class EmployeeController in which all methods are created for API endpoints for handling requests from the client.
EmployeeController.Java
package com.springjava.controller;

import java.util.LinkedHashMap;

import java.util.List;

import java.util.Map;

import org.springframework.beans.factory.annotation.Autowired;

import org.springframework.http.HttpStatus;

import org.springframework.http.ResponseEntity;

import org.springframework.web.bind.annotation.GetMapping;

import org.springframework.web.bind.annotation.PathVariable;

import org.springframework.web.bind.annotation.PostMapping;

import org.springframework.web.bind.annotation.RequestBody;

import org.springframework.web.bind.annotation.RequestMapping;

import org.springframework.web.bind.annotation.RestController;

import com.springjava.entity.Employee;

import com.springjava.service.EmployeeService;

@RestController

@RequestMapping("/api/employee")

public class EmployeeController {

  @Autowired

  EmployeeService empService;

  @PostMapping("/save")

  public ResponseEntity < ? > saveEmp(@RequestBody Employee employee) {

    Map < String, Object > respEmp = new LinkedHashMap < String, Object > ();

    empService.save(employee);

    respEmp.put("status", 1);

    respEmp.put("message", "Record is Saved Successfully!");

    return new ResponseEntity < > (respEmp, HttpStatus.CREATED);

  }

  @GetMapping("/list")

  public ResponseEntity < ? > getEmps() {

    Map < String, Object > respEmp = new LinkedHashMap < String, Object > ();

    List < Employee > emList = empService.findAll();

    if (!emList.isEmpty()) {

      respEmp.put("status", 1);

      respEmp.put("data", emList);

      return new ResponseEntity < > (respEmp, HttpStatus.OK);

    } else {

      respEmp.clear();

      respEmp.put("status", 0);

      respEmp.put("message", "Data is not found");

      return new ResponseEntity < > (respEmp, HttpStatus.NOT_FOUND);

    }

  }

  @GetMapping("/by-email/{email}")

  public ResponseEntity < ? > getEmpByEmail(@PathVariable String email) {

    Map < String, Object > respEmp = new LinkedHashMap < String, Object > ();

    try {

      Employee emp = empService.findByEmail(email);

      respEmp.put("status", 1);

      respEmp.put("data", emp);

      return new ResponseEntity < > (respEmp, HttpStatus.OK);

    } catch (Exception ex) {

      respEmp.clear();

      respEmp.put("status", 0);

      respEmp.put("message", "Data is not found");

      return new ResponseEntity < > (respEmp, HttpStatus.NOT_FOUND);

    }

  }

  @GetMapping("/by-mobile/{mob}")

  public ResponseEntity < ? > getEmpByMob(@PathVariable String mob) {

    Map < String, Object > respEmp = new LinkedHashMap < String, Object > ();

    try {

      Employee emp = empService.findByMobileNo(mob);

      respEmp.put("status", 1);

      respEmp.put("data", emp);

      return new ResponseEntity < > (respEmp, HttpStatus.OK);

    } catch (Exception ex) {

      respEmp.clear();

      respEmp.put("status", 0);

      respEmp.put("message", "Data is not found");

      return new ResponseEntity < > (respEmp, HttpStatus.NOT_FOUND);

    }

  }

}- This class is annotated with @RestController annotation to make this class act as a Rest Controller for giving responses in JSON form.
- We used @RequestMapping annotation to define the base URL for the application.
- We used @PostMapping and @GetMapping annotations in the methods for handling HTTP requests from the client.
- We used ResponseEntity to represent the entire HTTP response.
- We used @Autowired to inject EmployeeService into the class.
10. Run the Spring Boot Application and Check
Right-click this Spring Boot application on the DemoApplication.java then click on Run As, and select Java Application.
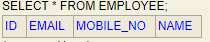
Check H2 Database
Check the H2 database console and browse this URL “http://localhost:8080/h2-console”.

See the below table here:
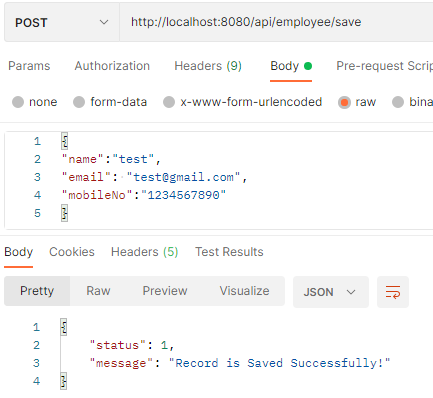
Testing API on the Postman
Saving the employee data
POST: http://localhost:8080/api/employee/save
Check the table:

Retrieving the employee data
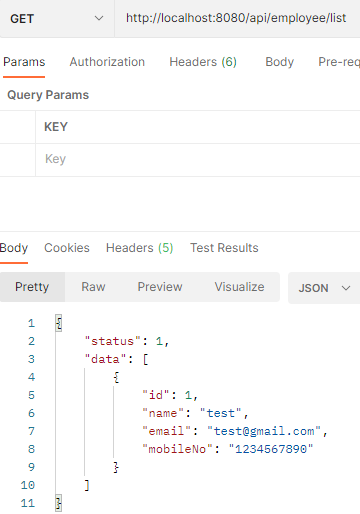
GET: http://localhost:8080/api/employee/list
Retrieving the employee data by email
GET: http://localhost:8080/api/employee/by-email/test@gmail.com

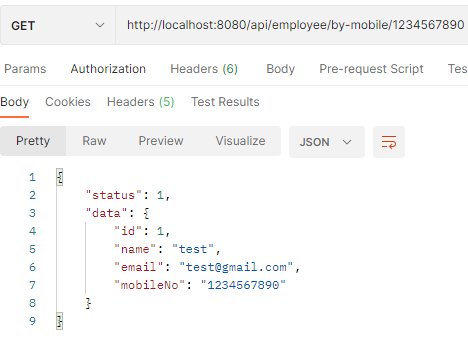
Retrieving the employee by mobileNo
GET: http://localhost:8080/api/employee/by-mobile/1234567890
Conclusion
In this topic, we learnt how to create custom queries in the JPA Repository in the Spring Boot restful web services application using @Query and JQPL of the Spring Data JPA.