In Spring Data JPA, the Having clause filters grouped data after applying the Group By clause in the query. It works similarly to the Where clause, but while Where filters individual records, Having filters aggregated results. We can use the JPA Repository Having clause using JPQL and Native SQL queries with the help of @Query annotation to create custom methods in the repository interface. This guide provides practical examples of using the having clause in JPA Repository queries using JPQL and native SQL.

Understanding the Having Clause in JPA
The Having clause is used when:
- Aggregated results (e.g., SUM(), COUNT(), AVG()) need filtering.
- It must be used after GROUP BY to apply conditions on grouped data.
Ways to use Having Clause in JPA Repository
These are the following ways to use Having clause in JPA Repository:
- Using Having Clause in JPQL
- Using Having Clause in Native SQL Query
Using Having Clause in JPQL
Example of finding Categories with more than 2 Products
public interface ProductRepository extends JpaRepository<Product, Long> {
@Query("SELECT p.category, COUNT(p) FROM Product p GROUP BY p.category HAVING COUNT(p) > :minCount")
List<Object[]> findCategoriesHavingMinProducts(int minCount);
}
● This example retrieves product categories that have more than 2 products.
Using Having Clause in Native SQL Query
Example of finding Categories Where Total Product Price exceeds 1000
public interface ProductRepository extends JpaRepository<Product, Long> {
@Query(value = "SELECT category, SUM(price) FROM product GROUP BY category HAVING SUM(price) > :minPrice", nativeQuery = true)
List<Object[]> findCategoriesHavingTotalPriceGreaterThan(double minPrice);
}
● This example finds product categories where the total price of all products exceeds 1000.
Step-by-step to Guide JPA Repository Having Clause
Let’s create a Spring Boot Application to use the Having clause in the JPA Repository step-by-step. Using the above-mentioned methods, we will create an example to get categories with more than 2 products and categories with the total price of products, which is more than 1,000, through the API endpoints.
These are the following steps:
- Create a Spring Boot Project
- Setup in the IDE
- Configure H2 Database
- Create a JPA Entity
- Create a Repository Interface
- Create a Service Interface
- Implement the Service Interface
- Create a Controller
- Run the Spring Boot Application
1. Create a Spring Boot Project
We are creating a Spring Boot Project from the web tool Spring Initializr. By Providing details for the project and select the following Maven dependencies:
- Spring Web
- Spring Data JPA
- H2 Database
- Lombok
2. Setup in the IDE
We use Eclipse IDE to set up and configure the created Spring Boot Project. You can use other IDE to set up and configure the Spring Boot project.
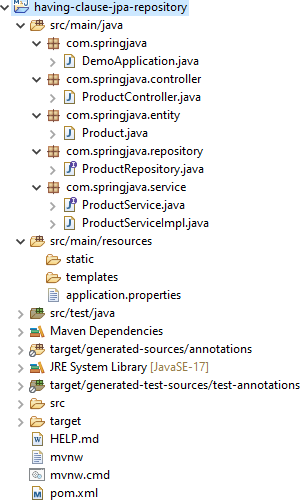
Project Structure of Spring Boot
This image shows the project structure of Spring Boot in Eclipse IDE.
Maven Dependency
Here is the complete maven dependencies file pom.xml for the project which will implement the Having clause in JPA Repository using Spring Boot Application.
pom.xml
<?xml version="1.0" encoding="UTF-8"?>
<project
	xmlns="http://maven.apache.org/POM/4.0.0"
	xmlns:xsi="http://www.w3.org/2001/XMLSchema-instance"

       xsi:schemaLocation="http://maven.apache.org/POM/4.0.0 https://maven.apache.org/xsd/maven-4.0.0.xsd">
	<modelVersion>4.0.0</modelVersion>
	<parent>
		<groupId>org.springframework.boot</groupId>
		<artifactId>spring-boot-starter-parent</artifactId>
		<version>3.3.0</version>
		<relativePath/>
		<!-- lookup parent from repository -->
	</parent>
	<groupId>com.springjava</groupId>
	<artifactId>demo</artifactId>
	<version>0.0.1-SNAPSHOT</version>
	<name>demo</name>
	<description>Demo project for Spring Boot</description>
	<properties>
		<java.version>17</java.version>
	</properties>
	<dependencies>
		<dependency>
			<groupId>org.springframework.boot</groupId>
			<artifactId>spring-boot-starter-data-jpa</artifactId>
		</dependency>
		<dependency>
			<groupId>org.springframework.boot</groupId>
			<artifactId>spring-boot-starter-web</artifactId>
		</dependency>
		<dependency>
			<groupId>com.h2database</groupId>
			<artifactId>h2</artifactId>
			<scope>runtime</scope>
		</dependency>
		<dependency>
			<groupId>org.projectlombok</groupId>
			<artifactId>lombok</artifactId>
			<optional>true</optional>
		</dependency>
		<dependency>
			<groupId>org.springframework.boot</groupId>
			<artifactId>spring-boot-starter-test</artifactId>
			<scope>test</scope>
		</dependency>
	</dependencies>
	<build>
		<plugins>
			<plugin>
				<groupId>org.springframework.boot</groupId>
				<artifactId>spring-boot-maven-plugin</artifactId>
				<configuration>
					<excludes>
						<exclude>
							<groupId>org.projectlombok</groupId>
							<artifactId>lombok</artifactId>
						</exclude>
					</excludes>
				</configuration>
			</plugin>
		</plugins>
	</build>
</project>
3. Configure H2 Database
We are configuring the H2 database configuration in the application.properties file.
application.properties
#H2 Database Configuration
spring.datasource.url=jdbc:h2:mem:test
spring.datasource.username=sa
spring.datasource.password=
spring.jpa.show-sql=true
spring.jpa.properties.hibernate.dialect=org.hibernate.dialect.H2Dialect
spring.jpa.hibernate.ddl-auto=update
spring.h2.console.enabled=true
4. Create a JPA Entity
Let’s create a JPA Entity class. For example, consider a Product entity and use Lombok for generating setter and getter methods, a constructor, etc.
Product.java
package com.springjava.entity;

import jakarta.persistence.Entity;
import jakarta.persistence.GeneratedValue;
import jakarta.persistence.GenerationType;
import jakarta.persistence.Id;
import lombok.Data;

@Data
@Entity
public class Product {
@Id
@GeneratedValue(strategy = GenerationType.IDENTITY)
private Long id;
private String name;
private String category;
private double price;
private int stock;
}
5. Create a Repository Interface
Create a repository interface for the Product JPA Entity class that interface extends the JpaRepository interface to perform persistence operations using the query method(saveAll) and adding custom methods annotated with @Query annotation to define query using having clause.
ProductRepository.java
package com.springjava.repository;

import java.util.List;
import org.springframework.data.jpa.repository.JpaRepository;
import org.springframework.data.jpa.repository.Query;
import com.springjava.entity.Product;

public interface ProductRepository extends JpaRepository<Product, Long> {
@Query("SELECT p.category, COUNT(p) FROM Product p GROUP BY p.category HAVING COUNT(p) > :minCount")
List<Object[]> findCategoriesHavingMinProducts(int minCount);
@Query(value = "SELECT category, SUM(price) FROM product GROUP BY category HAVING SUM(price) > :minPrice", nativeQuery = true)
List<Object[]> findCategoriesHavingTotalPriceGreaterThan(double minPrice);
}
6. Create a Service Interface
Create a Service interface ProductService with some method declaration.
ProductService.java
package com.springjava.service;

import java.util.List;
import com.springjava.entity.Product;

public interface ProductService {
void saveAll(List<Product> productList);
List<Object[]> getCategoriesHavingMinProducts(int minCount);
List<Object[]> getCategoriesHavingTotalPriceGreaterThan(double minPrice);
}
7. Implement the Service Interface
Implement the ProductService interface in the ProductServiceImpl class. This class is annotated with @Service annotation, where we inject ProductRepository to call all its methods.
ProductServiceImpl.java
package com.springjava.service;

import java.util.List;
import org.springframework.beans.factory.annotation.Autowired;
import org.springframework.stereotype.Service;
import com.springjava.entity.Product;
import com.springjava.repository.ProductRepository;

@Service
public class ProductServiceImpl implements ProductService {
@Autowired
private ProductRepository productRepo;

@Override
public void saveAll(List<Product> productList) {
productRepo.saveAll(productList);
}
@Override
public List<Object[]> getCategoriesHavingMinProducts(int minCount) {
return productRepo.findCategoriesHavingMinProducts(minCount);
}
@Override
public List<Object[]> getCategoriesHavingTotalPriceGreaterThan(double minPrice) {
return productRepo.findCategoriesHavingTotalPriceGreaterThan(minPrice);
 }
}
8. Create a Controller
Create a controller class ProductController. This is annotated with @RestController to make this class a RestController.
ProductController.java
package com.springjava.controller;

import java.util.LinkedHashMap;
import java.util.List;
import java.util.Map;
import org.springframework.beans.factory.annotation.Autowired;
import org.springframework.http.HttpStatus;
import org.springframework.http.ResponseEntity;
import org.springframework.web.bind.annotation.GetMapping;
import org.springframework.web.bind.annotation.PostMapping;
import org.springframework.web.bind.annotation.RequestBody;
import org.springframework.web.bind.annotation.RequestMapping;
import org.springframework.web.bind.annotation.RestController;
import com.springjava.entity.Product;
import com.springjava.service.ProductService;

@RestController
@RequestMapping("/api/product")
public class ProductController {

@Autowired
private ProductService productService;

@PostMapping("/save-all")
public ResponseEntity<?> save(@RequestBody List<Product> productList) {
Map<String, Object> respProd = new LinkedHashMap<String, Object>();
productService.saveAll(productList);
respProd.put("status", 1);
respProd.put("message", "Record is Saved Successfully!");
return new ResponseEntity<>(respProd, HttpStatus.CREATED);
}

@GetMapping("/categories-products")
public ResponseEntity<?> getCategoriesHavingMinProducts() {
Map<String, Object> respProd = new LinkedHashMap<String, Object>();
List<Object[]> cList= productService.getCategoriesHavingMinProducts(5);
if (!cList.isEmpty()) {
respProd.put("status", 1);
respProd.put("data", cList);
return new ResponseEntity<>(respProd, HttpStatus.OK);
} else {
respProd.clear();
respProd.put("status", 0);
respProd.put("message", "Data is not found");
return new ResponseEntity<>(respProd, HttpStatus.NOT_FOUND);
   }
}

@GetMapping("/categories-total-price")
public ResponseEntity<?> getCategoriesHavingTotalPriceGreaterThan() {
Map<String, Object> respProd = new LinkedHashMap<String, Object>();
List<Object[]> cList= productService.getCategoriesHavingTotalPriceGreaterThan(1000);
List<Object>clist1=new ArrayList<>();
clist1.add(cList.get(0)[0]);
clist1.add(((BigDecimal)cList.get(0)[1]).doubleValue());
if (!cList.isEmpty()) {
respProd.put("status", 1);
respProd.put("data", cList1);
return new ResponseEntity<>(respProd, HttpStatus.OK);
} else {
respProd.clear();
respProd.put("status", 0);
respProd.put("message", "Data is not found");
return new ResponseEntity<>(respProd, HttpStatus.NOT_FOUND);
   }
 }
}
9. Run the Spring Boot Application
Right-click this Spring Boot application on the DemoApplication.java, then click Run As and select Java Application.
H2 Database Console
To check the H2 database console, browse to the URL “http://localhost:[server_port]/h2-console” in the browser.
JSON Array
We are creating a sample JSON Array to test the API http://localhost:8080/product/save-all.
[
  {
"name" :"Laptop",
"category":"Electronics",
"price":2000,
"stock":5
},
{
"name" :"Mobile",
"category":"Electronics",
"price":1500,
"stock":15
},
{
"name" :"Ear-Bud",
"category":"Electronics",
"price":500,
"stock":10
},
{
"name" :"T-Shirt",
"category":"Clothes",
"price":200,
"stock":10
},
{
"name" :"Jeans",
"category":"Clothes",
"price":500,
 "stock":10
}
]
Test the APIs on the Postman Tool
POST: http://localhost:8080/api/product/save-all

GET: http://localhost:8080/api/product/categories-products

This API hits then Spring Data JPA (internally uses Hibernate as a JPA provider) generates SQL statement in the console below here:
Hibernate: select p1_0.category,count(p1_0.id) from product p1_0 group by p1_0.category having count(p1_0.id)>?GET: http://localhost:8080/api/product/categories-total-price

This API hits then Spring Data JPA (internally uses Hibernate as a JPA provider) generates SQL statement in the console below here:
Hibernate: SELECT category, SUM(price) FROM product GROUP BY category HAVING SUM(price) > ?Best Practices for Using Having in JPA
● Use Having Only with Aggregated Data: Apply Having only when filtering grouped results.
● Use Where for Individual Records: If filtering before aggregation, use Where instead of Having.
● Optimize Performance: Ensure indexes on columns used in Group By to speed up queries.
● Prefer JPQL for Portability: Use JPQL unless database-specific optimizations are needed.
Practical Comparison: Where vs Having
| Feature | WHERE Clause | HAVING Clause |
| Filters | Individual records before aggregation | Grouped results after aggregation |
| Works With | Normal fields (e.g., price > 100) | Aggregated fields (SUM(price) > 5000) |
| Can Use Aggregate Functions? | ❌ No | ✅ Yes |
| Performance | It is faster, as it filters before grouping | It is slower, as it filters after grouping |
Example: Where vs Having
— WHERE filters records before aggregation
SELECT category, SUM(price) FROM products WHERE price > 100 GROUP BY category;— HAVING filters aggregated results after GROUP BY
SELECT category, SUM(price) FROM products GROUP BY category HAVING SUM(price) > 1000;Conclusion
The Having clause in JPA Repository is helpful for filtering aggregated data after GROUP BY.
● Use JPQL for database-independent queries.
● Use native queries for complex or performance-optimized SQL.
● Use Where for individual record filtering and Having for aggregated results filtering.