To use this in the spring boot example we need to add a Rest Repositories dependency in the pom.xml of the example. This dependency allows us to build a hypermedia-driven Restful web service from the Spring Data repositories. This topic will teach us to use Spring Data Rest in the Spring Boot example. For this, we will create a CRUD Rest API Spring Boot Application step-by-step using Maven, Rest Repositories, Lombok, Spring Data JPA, and H2 database without having to manually implement of service, controller and handling HTTP requests method.
Creating Rest Apis by using this Spring module in Spring Boot Application no need to create Rest Controller class and Service class manually to expose rest API endpoints. This can automatically expose Spring Data JPA Repository as restful API endpoints.
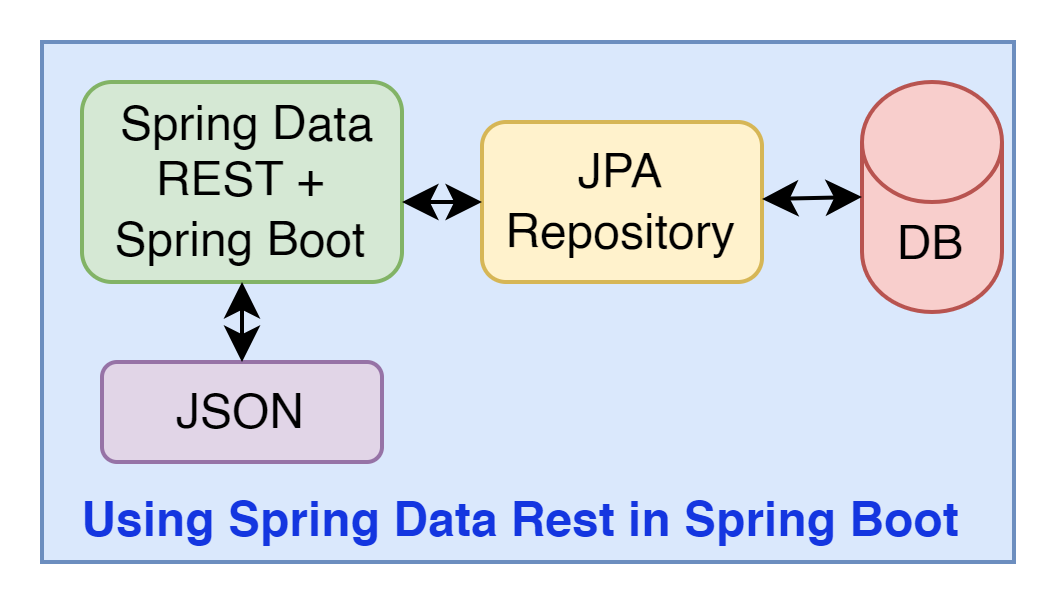
Spring Data REST vs Spring Data JPA
Spring Data JPA is used to communicate with the database for performing persistence operations with the JPA entities and JPA repositories.
Spring Data REST is used to expose restful web services with Spring Data JPA repositories due to this no write additional Controller and Service classes like the Spring MVC application need to create Controller and Service classes for exposing restful web services.
Let’s implement the build CRUD REST Apis example with the use of this in the Spring Boot application and check those Apis endpoints on the Postman.
1. Creating a Spring Boot Starter Project
We are creating a Spring Boot Application from the web tool Spring Initializr or you can create from IDE(STS, vs code etc.) which you are using.
Add the following dependencies:
• Spring Data JPA
• Rest Repositories
• Lombok
• H2 Database
2. Keep the IDE ready
We are importing this created application into our Eclipse IDE or you can import it into another IDE that you are using. You can refer to this article to learn about how to create and set up the Spring Boot Project in Eclipse IDE to import the project in the Eclipse IDE.
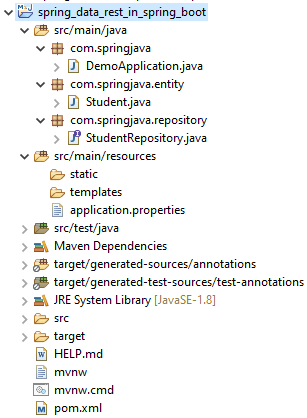
Project Structure
3. Maven Dependency
Here is the complete pom.xml file of this created application.
pom.xml
<?xml version="1.0" encoding="UTF-8"?>
<project xmlns="http://maven.apache.org/POM/4.0.0"
    xmlns:xsi="http://www.w3.org/2001/XMLSchema-instance"
    xsi:schemaLocation="http://maven.apache.org/POM/4.0.0 https://maven.apache.org/xsd/maven-4.0.0.xsd">
    <modelVersion>4.0.0</modelVersion>
    <parent>
        <groupId>org.springframework.boot</groupId>
        <artifactId>spring-boot-starter-parent</artifactId>
        <version>2.6.3</version>
        <relativePath /> <!-- lookup parent from repository -->
    </parent>
    <groupId>com.springjava</groupId>
    <artifactId>demo</artifactId>
    <version>0.0.1-SNAPSHOT</version>
    <name>demo</name>
    <description>Demo project for Spring Boot</description>
    <properties>
        <java.version>8</java.version>
    </properties>
    <dependencies>
        <dependency>
            <groupId>org.springframework.boot</groupId>
            <artifactId>spring-boot-starter-data-jpa</artifactId>
        </dependency>
        <dependency>
    <groupId>org.springframework.boot</groupId>
    <artifactId>spring-boot-starter-data-rest</artifactId>
</dependency>
        <dependency>
            <groupId>org.projectlombok</groupId>
            <artifactId>lombok</artifactId>
            <optional>true</optional>
        </dependency>
        <dependency>
            <groupId>com.h2database</groupId>
            <artifactId>h2</artifactId>
            <scope>runtime</scope>
        </dependency>
        <dependency>
            <groupId>org.springframework.boot</groupId>
            <artifactId>spring-boot-starter-test</artifactId>
            <scope>test</scope>
        </dependency>
    </dependencies>
    <build>
        <plugins>
            <plugin>
                <groupId>org.springframework.boot</groupId>
                <artifactId>spring-boot-maven-plugin</artifactId>
            </plugin>
        </plugins>
    </build>
</project>
4. Defining the Configurations
We are configuring the H2 database connection, JPA, Hibernate and base URI configurations in the application.properties file.
application.properties
# Configuring Spring Data Rest
spring.data.rest.basePath=api
# H2 Database Configuration
spring.datasource.url=jdbc:h2:mem:test
spring.datasource.username=sa
spring.datasource.password=
spring.jpa.show-sql=true
spring.jpa.properties.hibernate.dialect=org.hibernate.dialect.H2Dialect
spring.jpa.hibernate.ddl-auto=update
spring.h2.console.enabled=true
→ We can also modify the following properties (starting with spring.data.rest.xxx):
• defaultPageSize: This is used to change the default for the number of items shown on a single page.
• maxPageSize: This is used to change the maximum number of items on a single page.
• pageParamName: This is used to change the name of the query parameter for selecting pages.
• limitParamName: This is used to change the name of the query parameter for the number of items to show on a page.
• sortParamName: This is used to change the name of the query parameter for sorting.
• defaultMediaType: This is used to change the default media type to use when none is specified.
• returnBodyOnCreate: This is used to change when whether a body should be returned when creating a new entity.
• returnBodyOnUpdate: This is used to change when whether a body should be returned when updating an entity.
5. Creating a JPA Entity class
We are creating a JPA entity class to create a table through Java code. This class has some properties(id, studentName, email and mobileNo).
Student.java
package com.springjava.entity;
import javax.persistence.Entity;
import javax.persistence.GeneratedValue;
import javax.persistence.GenerationType;
import javax.persistence.Id;
import lombok.Data;
@Data
@Entity
public class Student{
@Id
@GeneratedValue(strategy = GenerationType.IDENTITY)
private Integer id;
private String studentName;
private String email;
private String mobileNo;
}
→ The @Data annotation is a Lombok annotation which generates a constructor, setter method, getter method, etc. for this Java Bean class.
→ This @Entity annotation generates a table in the created database.
→ This @Id annotation is used to create the Primary key column for the table.
→ This @GeneratedValue annotation is used to increment the column.
→ The GenerationType.IDENTITY is used to assign primary keys for the entity using the database identity column.
6. Creating a JPA Repository
We are creating a repository to communicate with the Student from the database.
StudentRepository.java
package com.springjava.repository;
import org.springframework.data.jpa.repository.JpaRepository;
import org.springframework.data.rest.core.annotation.RepositoryRestResource;
import com.springjava.entity.Student;
@RepositoryRestResource(path="students")
public interface StudentRepository extends JpaRepository<Student, Integer> {
}
→ This StudentRepository interface is exposing restful web services because it is annotated with @RepositoryRestResource annotation. This annotation allows us to customise the restful Apis endpoints and behaviour and defines a path for the base URI for the resource.
7. Run the Spring Boot Application and Check
Right Click on the DemoApplication.java then click on RunAs, and select Java Application.
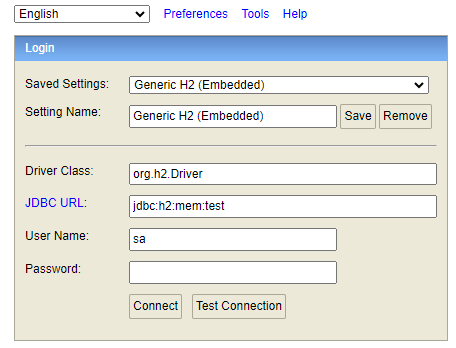
Check H2 Database
→ Check the H2 database console and browse this URL “http://localhost:8080/h2-console” for table is created or not.
See the table below:

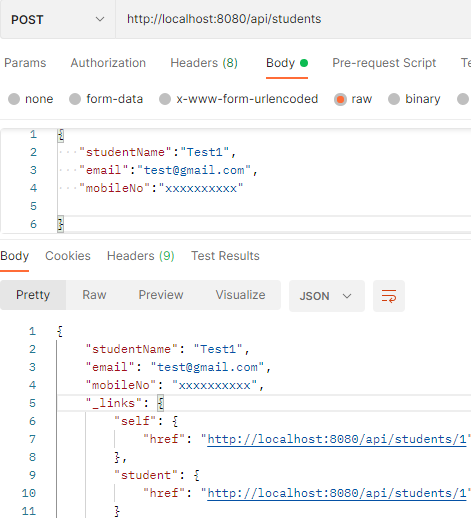
Let’s test Rest Apis on the Postman
To save Student:
POST: http://localhost:8080/api/students
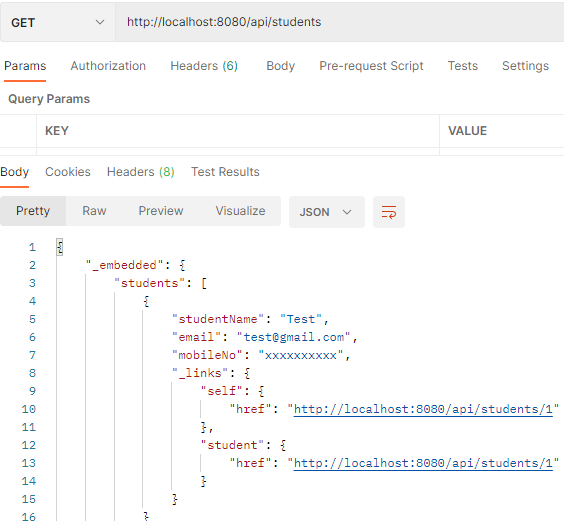
To retrieve all Students:
GET: http://localhost:8080/api/students
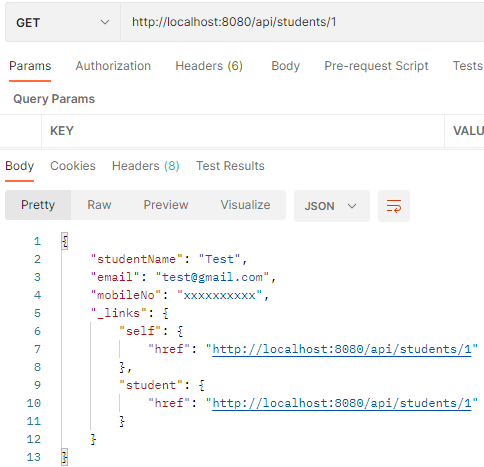
Retrieve a Student by Id:
GET: http://localhost:8080/api/students/1
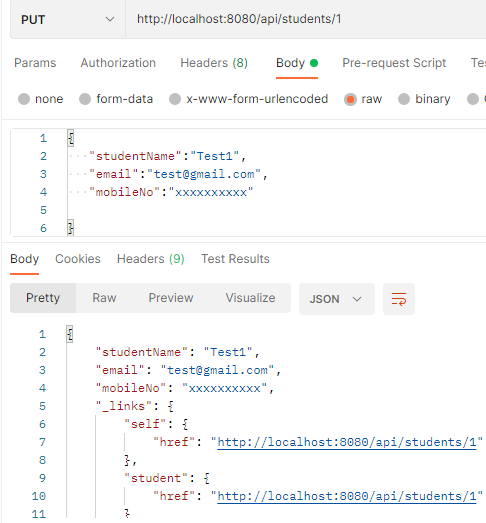
Update some Student:
PUT: http://localhost:8080/api/students/1
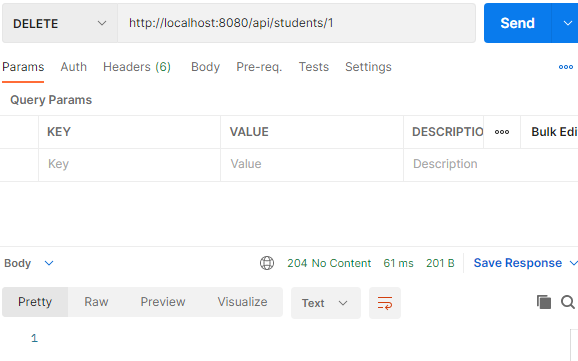
Delete a Student by Id:
DELETE: http://localhost:8080/api/students/1
Checking the table record is deleted:

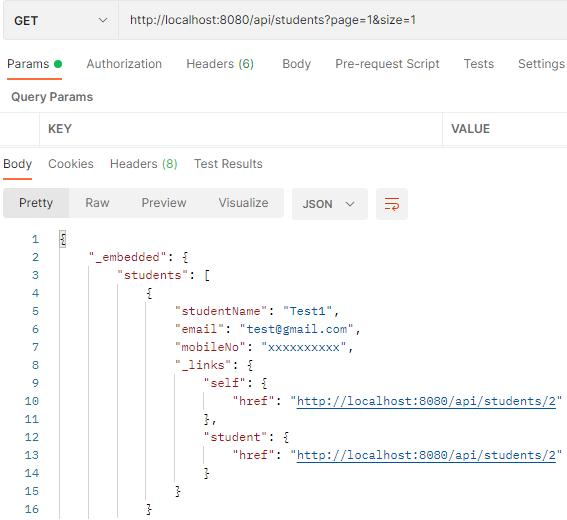
Pagination and Sorting Support
We are checking the Pagination and Sorting support of this Spring Framework feature.
Pagination:
GET: http://localhost:8080/api/students?page=1&size=1
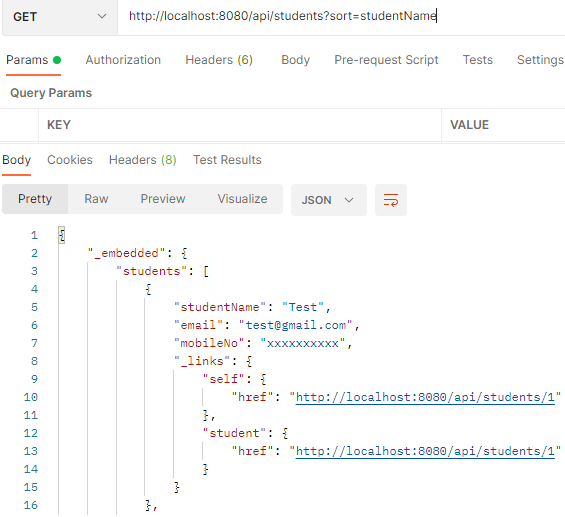
Sorting:
GET: http://localhost:8080/api/students?sort=studentName
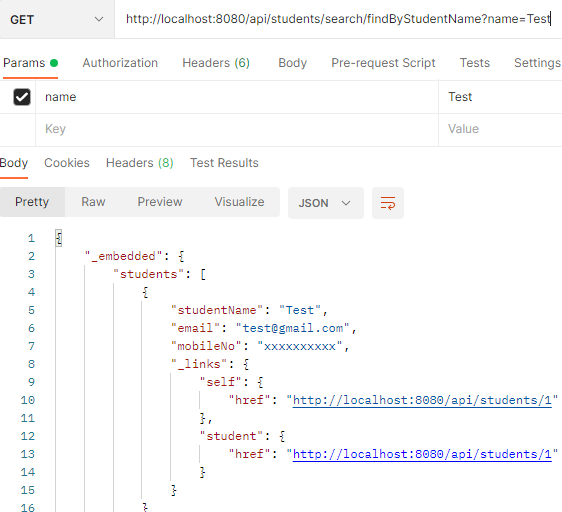
REST API for Query Method
Let’s create a query method in the StudentRepository.
package com.springjava.repository;
import java.util.List;
import org.springframework.data.jpa.repository.JpaRepository;
import org.springframework.data.rest.core.annotation.RepositoryRestResource;
import com.springjava.entity.Student;
@RepositoryRestResource(path="students")
public interface StudentRepository extends JpaRepository<Student, Integer> {
List<Student> findByStudentName(String name);
}
Let’s test the API in the Postman
GET: http://localhost:8080/api/students/search/findByStudentName?name=Test
Conclusion
In this topic, we learnt how to use Spring Data REST in Spring Boot for the creation of REST API.